Monday, October 31, 2011
Heresy Era Thousand Sons - Motor Pool Painting In Progress
As I'd just painted a mess of guard infantry I thought it was time to work on some vehicles. There are a number of Thousand Sons transports and whatnot that have been languishing in various states of disarray, so I settled in to get all of them brought up to the same level of painting.
First up is the group shot. Quite a few vehicles being batch painted at once, but the heavy lifting (the reds) is done, so now it's just a matter of doing all the detail work. Still need to add the Bone and White, but after that they'll be nearly complete!
A pair of Dreadclaw-styled drop pods for the infantry, based on the excellent tutorial by Old School Terminator over at Dark Future Games. The build on these is super simple, and ends up being a rather passable adaptation of the FW variant. ...And half the cost!
I also built two more Rhino chassis using the excellent add-on kit from Machinator over at Blood and Skulls Industry. Unlike the previous Rhino, I wanted to allow for some armament swaps, so I left the top hatches separate, and added some magnetized havok missile launchers (allowed in the TF Age of the Emperor codex I'm using).
I wanted to add a Whirlwind to the force (as the upcoming event is set early in the heresy and will pit the still-all-loyalist Marines against a myriad of foes), and went with an old-school approach based on an old White Dwarf set of instructions to build a Whirlwind Launcher out of some plasticard and a pair of 40mm bases. Some decorations and a missile launch in progress, and it turned out pretty decent!
The second Rhino will likely serve as a transport, but I included another ringed top hatch for use in the future (or as a turret ring for the previously built Predator, for those times I don't wish to include side sponsons).
All in all, a fair bit of forward progress. Once these are done, all that remains are a further 20 infantry, a pair of Contemptor Dreadnoughts and Magnus the Red himself!
Labels:
Conversion,
Drop Pod,
Horus Heresy,
Rhino,
Thousand Sons,
Whirlwind
Tuesday, October 25, 2011
Heresy Era Thousand Sons - The March To Godhammer
The fine folks over at the Tempus Fugitives have released the initial mission pack for the campaign weekend in March - "Hammer of the Gods". Set on the recently-rediscovered Machine World of Godhammer, several factions will battle for supremacy over the planet. The weekend will consist of a number of battles both on the surface, and on/around the series of space elevators known as Skyhooks, with the results of the battles affecting the outcome of subsequent battles (and as I understand it, subsequent campaign weekends set on the same planet).
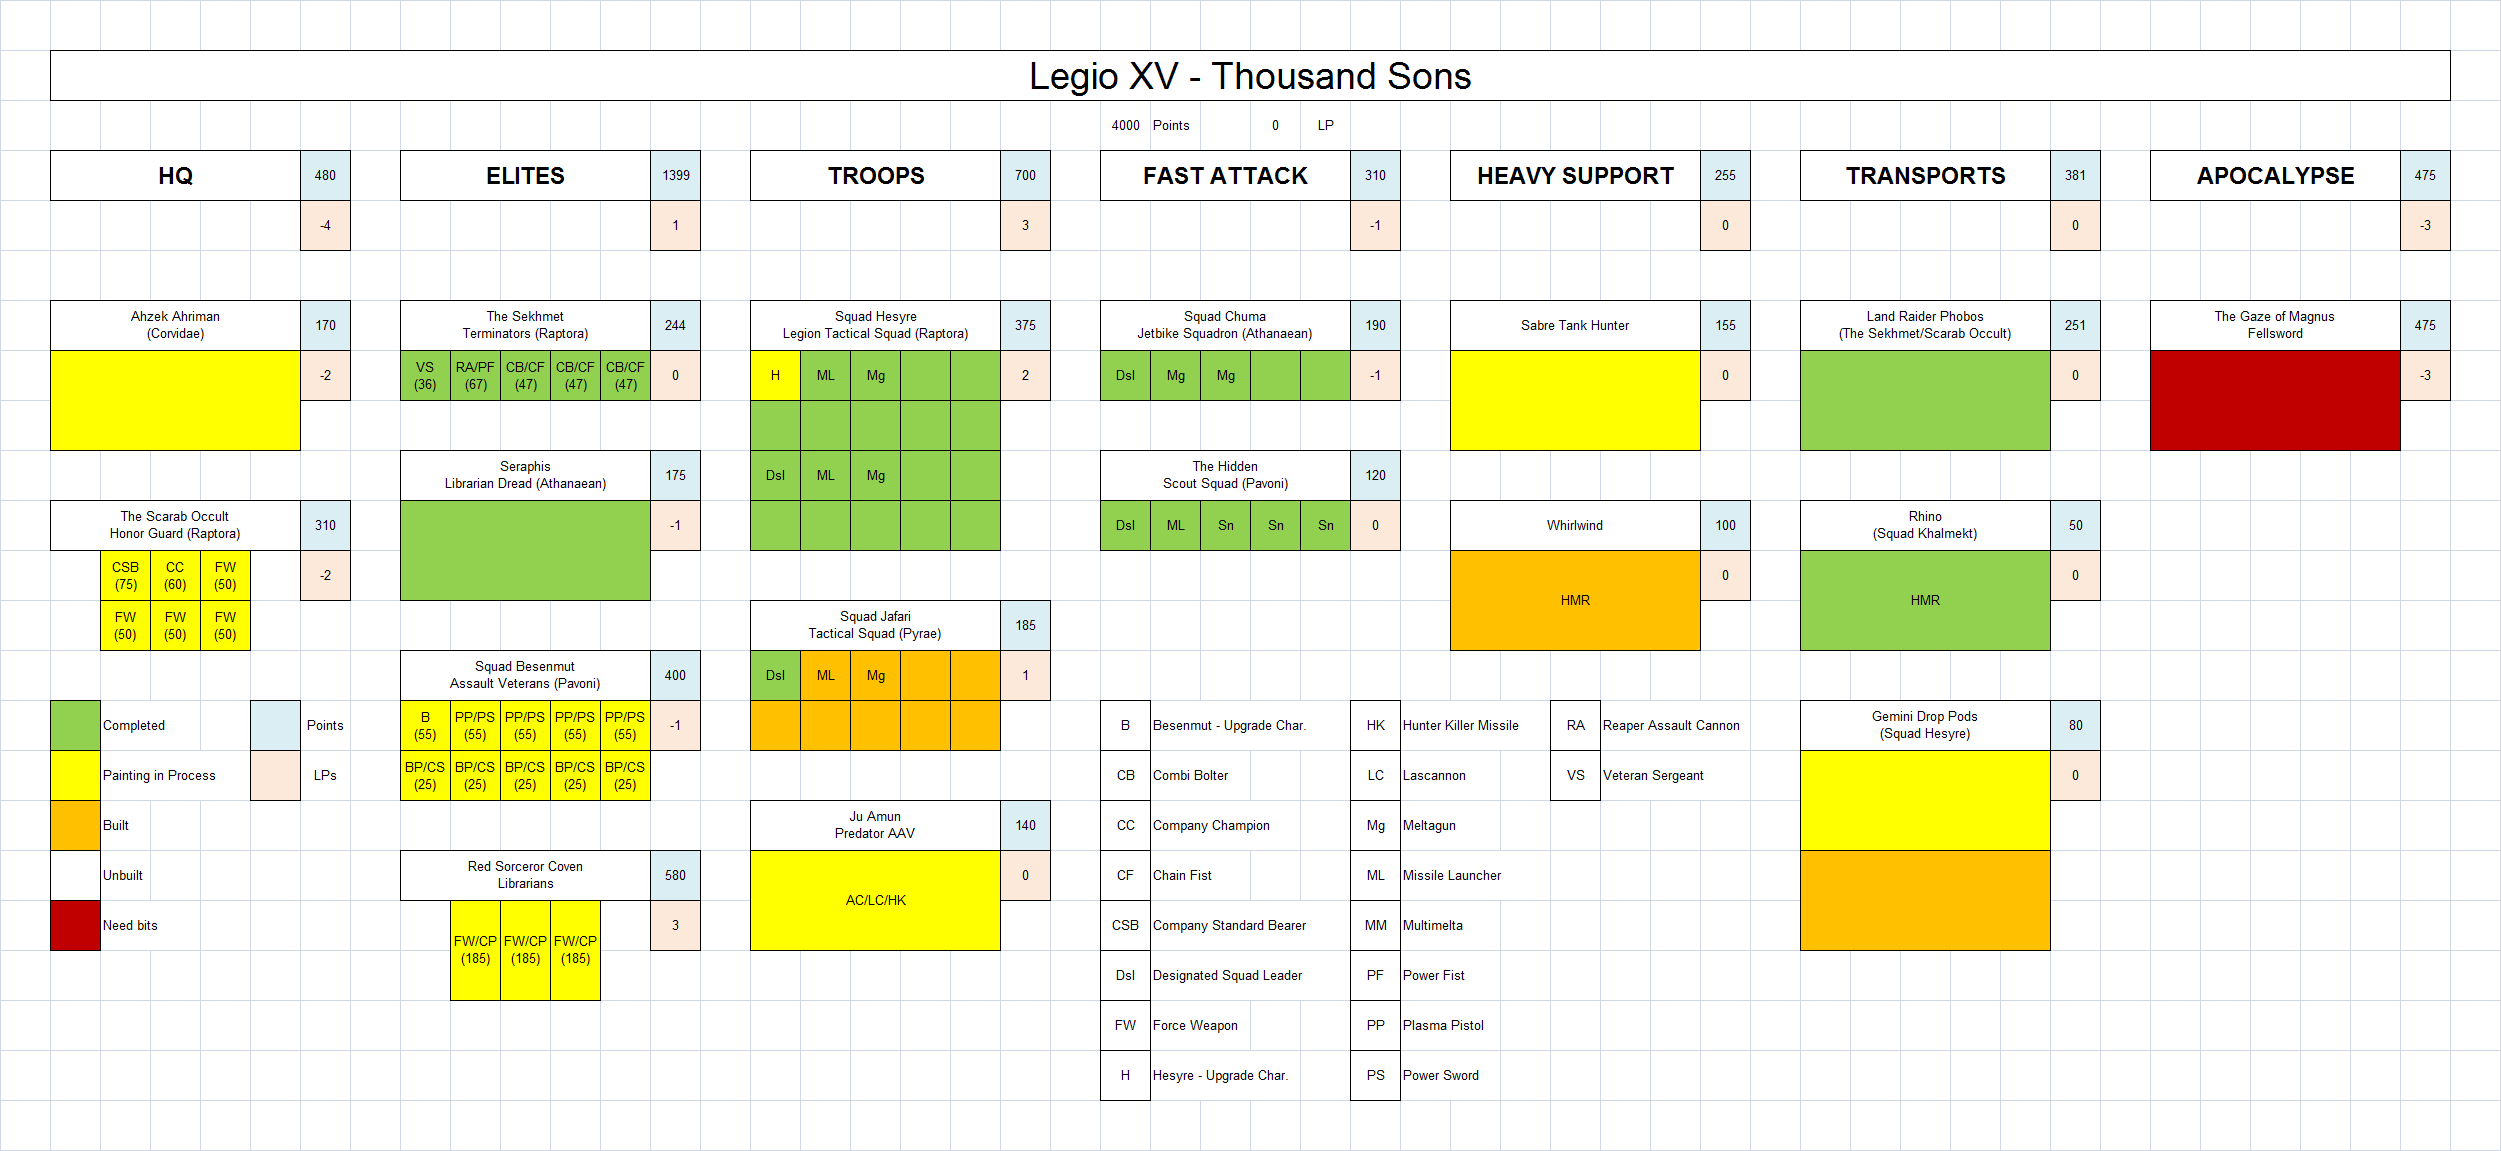
That said, I pulled all the Thousand Sons out to see exactly where things stand, and decide what I wanted to take for the campaign weekend. I was pleased to note that I'm well past the half-way point on getting the army painted!
The first mission outlined in the campaign pack is the "Skyhook" mission, in which small forces (1000pts) vie for control of the space elevators, which will allow for easier deployment of the ground assault force missions subsequently. There are some restrictions to the army choices however:
I'm not 100% sold on this list - while it utilized the Assault Vets and Jetbikes, it does feel a bit too "all the eggs in one basket" for my tastes, so I may cut down on the Vets a bit and add in some regular Tactical marines to give the list some flexibility (at the risk of more models plummeting to their doom each round).
The second mission type is "Invasion Team Battles" wherein two players join forces, each bringing 2000 points following the standard FOC, though one player on the team may include a single Superheavy. As I have a Falchion (legion Shadowsword) in the works, I'm hoping I can find a suitable partner for this portion of the event, though I'll be making a second list sans Superheavy. In the meantime, the list looks like this:
Alternately, instead of playing a doubles game, one of the options is to take a single 4000 point army including a single superheavy, so I took a pencil to it and came up with a first cut at the Big List:
Pretty much uses up every model that I've build for the Thousand Sons so far, with the exception of Magnus the Red, and a pair of Contemptor Dreadnoughts. I'm waiting to find out what the FOC restrictions are for the 4000 point option however. If it's designed such that I need to essentially build two separate 2000 point armies I won't be able to do it as I don't have the mandatory 4 Troops choices. I could get around it by building another ten Tactical marines and running them as four separate ten man squads, but I'm hoping to avoid buying and building any more models for the army. On the other hand, it may behoove me to just focus on doing the 2000 point game - that way there's less that I need to finish painting, as well as fewer models to have to package and send across the ocean risking damage or loss...
Given the above 4000 point list as the options from which I may pick and choose for the Skyhook or Invasion Team missions, I'd be happy to receive any suggestions about alternate army selections for those missions!
That said, I pulled all the Thousand Sons out to see exactly where things stand, and decide what I wanted to take for the campaign weekend. I was pleased to note that I'm well past the half-way point on getting the army painted!
The first mission outlined in the campaign pack is the "Skyhook" mission, in which small forces (1000pts) vie for control of the space elevators, which will allow for easier deployment of the ground assault force missions subsequently. There are some restrictions to the army choices however:
- Only units entering play via Deep Strike may be held in reserve.
- The following units may be used in a Skyhook battle without any additional rules – Jetbikes; Jump Infantry; Jet Infantry; Beasts; Skimmers
- The following units may be used in a Skyhook battle but suffer from the ‘unstable footing’ special rule – Infantry; Heavy Infantry; Bike Infantry; Cavalry; Monstrous Creatures; Walkers.
- Your Skyhook army may NOT include flyers, units with Structure points, Gargantuan Creatures or any Apocalypse Formations. Vehicles detailed only in Forge World's Imperial Armour publications may be used. If a vehicle is described in more than one publication the most recent version must be used.
- UNSTABLE FOOTING: Models affected by this rule must take a Dangerous Terrain test at the start of each turn. Wounds suffered cause Instant Death. This represents the rapidly moving and unstable platform on which they are fighting slipping from beneath them and pitching them headlong over the edge.
I'm not 100% sold on this list - while it utilized the Assault Vets and Jetbikes, it does feel a bit too "all the eggs in one basket" for my tastes, so I may cut down on the Vets a bit and add in some regular Tactical marines to give the list some flexibility (at the risk of more models plummeting to their doom each round).
The second mission type is "Invasion Team Battles" wherein two players join forces, each bringing 2000 points following the standard FOC, though one player on the team may include a single Superheavy. As I have a Falchion (legion Shadowsword) in the works, I'm hoping I can find a suitable partner for this portion of the event, though I'll be making a second list sans Superheavy. In the meantime, the list looks like this:
Alternately, instead of playing a doubles game, one of the options is to take a single 4000 point army including a single superheavy, so I took a pencil to it and came up with a first cut at the Big List:
Pretty much uses up every model that I've build for the Thousand Sons so far, with the exception of Magnus the Red, and a pair of Contemptor Dreadnoughts. I'm waiting to find out what the FOC restrictions are for the 4000 point option however. If it's designed such that I need to essentially build two separate 2000 point armies I won't be able to do it as I don't have the mandatory 4 Troops choices. I could get around it by building another ten Tactical marines and running them as four separate ten man squads, but I'm hoping to avoid buying and building any more models for the army. On the other hand, it may behoove me to just focus on doing the 2000 point game - that way there's less that I need to finish painting, as well as fewer models to have to package and send across the ocean risking damage or loss...
Given the above 4000 point list as the options from which I may pick and choose for the Skyhook or Invasion Team missions, I'd be happy to receive any suggestions about alternate army selections for those missions!
Labels:
Army Lists,
Conversion,
Horus Heresy,
Painting Chart,
Thousand Sons
Friday, October 21, 2011
Mordian 7th Regiment - Veterans painted, advisors rebased
It's been crazy busy at work of late, but I did manage to find a little time to polish off the Veteran squads.
2nd Platoon, 1st Squad - The heavy infantry killers, armed with a trio of plasma guns, a plasma pistol and poweraxe-toting sergeant, and the 2nd platoon standard. It has no in-game effect, just a decorative addition.
2nd Platoon, 2nd Squad - The Anti-tank squad, armed with three melta gunss, a sergeant with a power fist and the squad demolitions upgrade.
While I was about it, I started rebasing the older models that are being folded into the new army. In this case the advisers - I decided the regimental command staff seconded to D company would wear red armor to help them stand out a bit. There's a fair number of models from the older version of the army that will be getting rebased. Luckily it's a simple matter of repainting them from grey to earth tones and adding a bit of static grass. Easy peasy!
Labels:
Hardened Veterans,
Mordian 7th
Wednesday, October 12, 2011
Mordian 7th Regiment - Veterans painting in progress
After the better part of two months hammering away at my Thousand Sons, I decided I needed a change of pace color-wise to keep me sane. So much crimson and gold! That said I risked a foray into the Closet of Doom and pulled out some of the glorious 7th that have been languishing in a primered state since earlier this summer, and got cracking.
I didn't want to jump in on the huge mass of vanilla troopers, but did want to get a chunk of infantry on the painting desk, so I figured the two Veteran squads would fit the bill. The first squad is the heavy infantry killer squad, armed with a trio of plasma guns, and a plasma pistol/power axe wielding sergeant. As both squads are intended to be carried into battle via Valkyrie/Vendettas, they all got Grav Chutes from Forge World. In addition I tried to add a bit more personality to the units, using a mix of Catachan bare arms, FW respirator helmets, and plenty of extra pouches and gear (hard to see in the partially-painted state though). Essentially I was going for a more rough-and-tumble look for the veterans to contrast with the more uniform look of the regular troopers. Still a lot of work to do on these of course, for the most part each color only has two or three of four stages complete. Lots of highlighting and details yet to add!
The second Veterans squad are the Demolitions/Tank Hunters squad, with a trio of Melta guns, demolition charges, krak grenades and so on. The Sergeants in the two units pictured (as well as the rest of the officers in the army) have breastplates taken from the Fantasy Empire Greatswords kit, to hearken back to the old RT-era officers look. Plenty left to do of course, adding the red piping on the tunics and trousers, as well as the yellow for the weapons casings should hopefully help the models pop. At the moment they're rather monochromatic.
Hoping I can find some time to finish these off over the upcoming weekend!
Labels:
Conversion,
Hardened Veterans,
Mordian 7th
Monday, October 3, 2011
Heresy Era Thousand Sons - Jetbikes and Scouts painted
Managed to finish up the basic paint jobs on the Jetbikes and Scouts over the weekend and snapped a couple pictures to share!
Here's the whole unit - I scrounged through my bits box for a number of different lengths of flying stand so the unit has a bit of a sense of motion to it. The flying stands have all been trimmed, drilled and pinned to the models for stability.
The models were originally built prior to the newest version of the codex for the Tempus Fugitives events - in previous incarnations, the Thousand Sons were allowed to buy sorcerer sergeants for various squads though some of those options have been removed in the more recent version. Originally he was to be armed with a force weapon (hence the khopesh style sword) but at this point he's only allowed a power weapon. That being the case, this one (and the one on the Terminator sergeant) have been painted in the blue power weapon colors that I use as opposed to the green force weapon color. This allows me to quickly identify what the model is armed with on the table even if the actual weapons are the same style.
Can't go wrong with a pair of melta guns in your jet bike squadron, now can you? The squad serves a dual purpose - one, to deliver the melta guns into position to melt down some tanks, and two to act as a locator beacon for deep striking or teleporting models (of which the Thousand Sons have a lot)!
Two vanilla marines to round out the squad. It was only after taking the pictures that I noticed that I have a little splotch of gold on the front of one of the bikes. Curses! Gotta fix that.
Finally, the five man Recon Marine (aka Scout) squad. Fairly straightforward head swap and the addition of the old-style missile launcher and they're good to go.
Labels:
Conversion,
Horus Heresy,
Jetbikes,
Scouts,
Thousand Sons
Monday, September 26, 2011
Battle report(ish) - Thousand Sons vs Blood Angels
Over the weekend my Blood Angel playing friend and I took a whack at a 1500 point game using the Age of the Emperor rules for the campaign weekend we're planning on attending this coming March. Our intent was to try out the lists as well as get a feel for speed of play, knowing that the rounds in the campaign weekend are roughly two hours.
That said, I didn't take the time to meticulously document the game, but just snapped some pictures here and there of things that looked interesting and I thought I'd share the results.
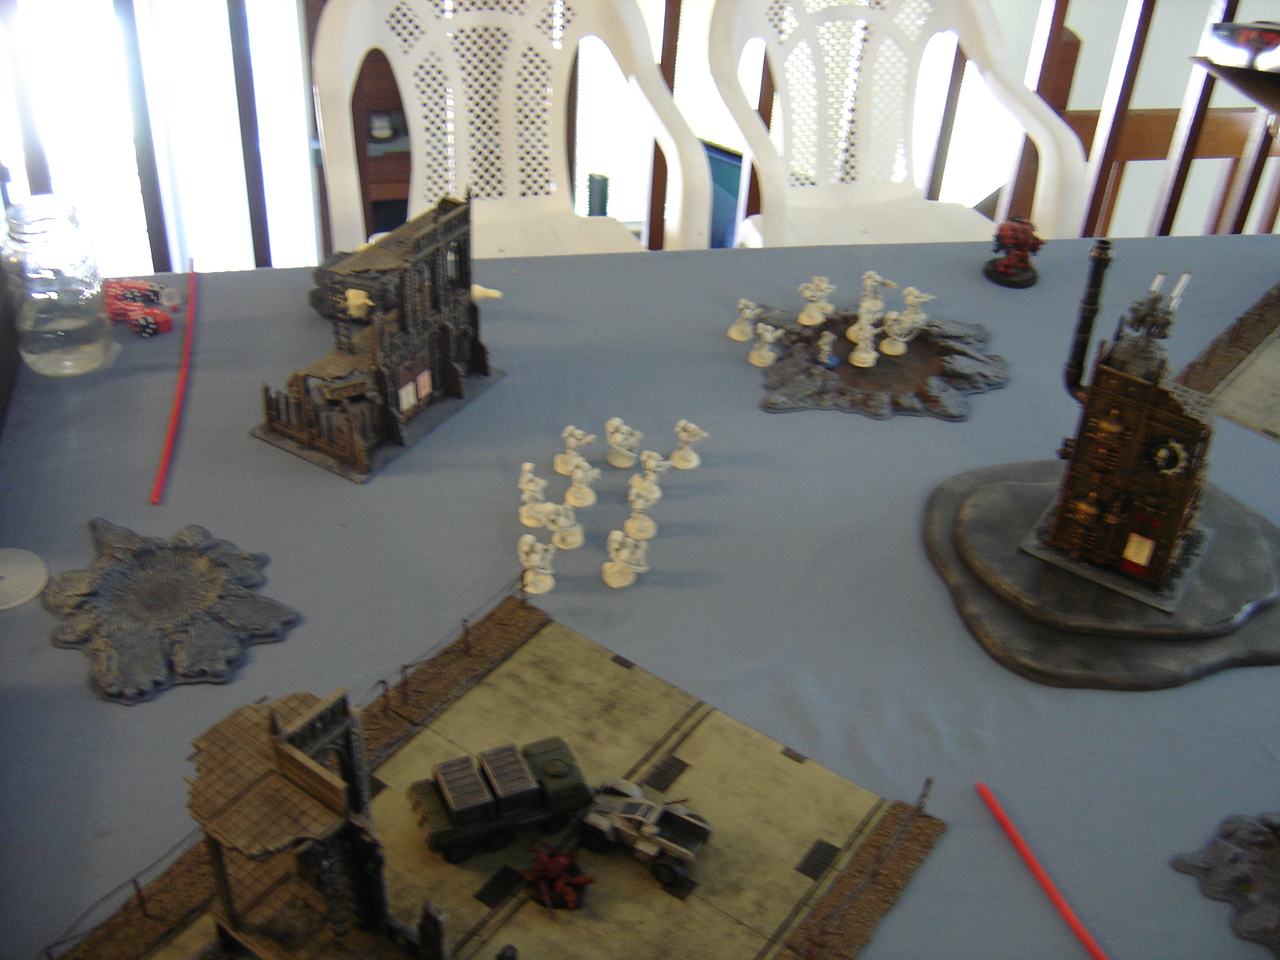
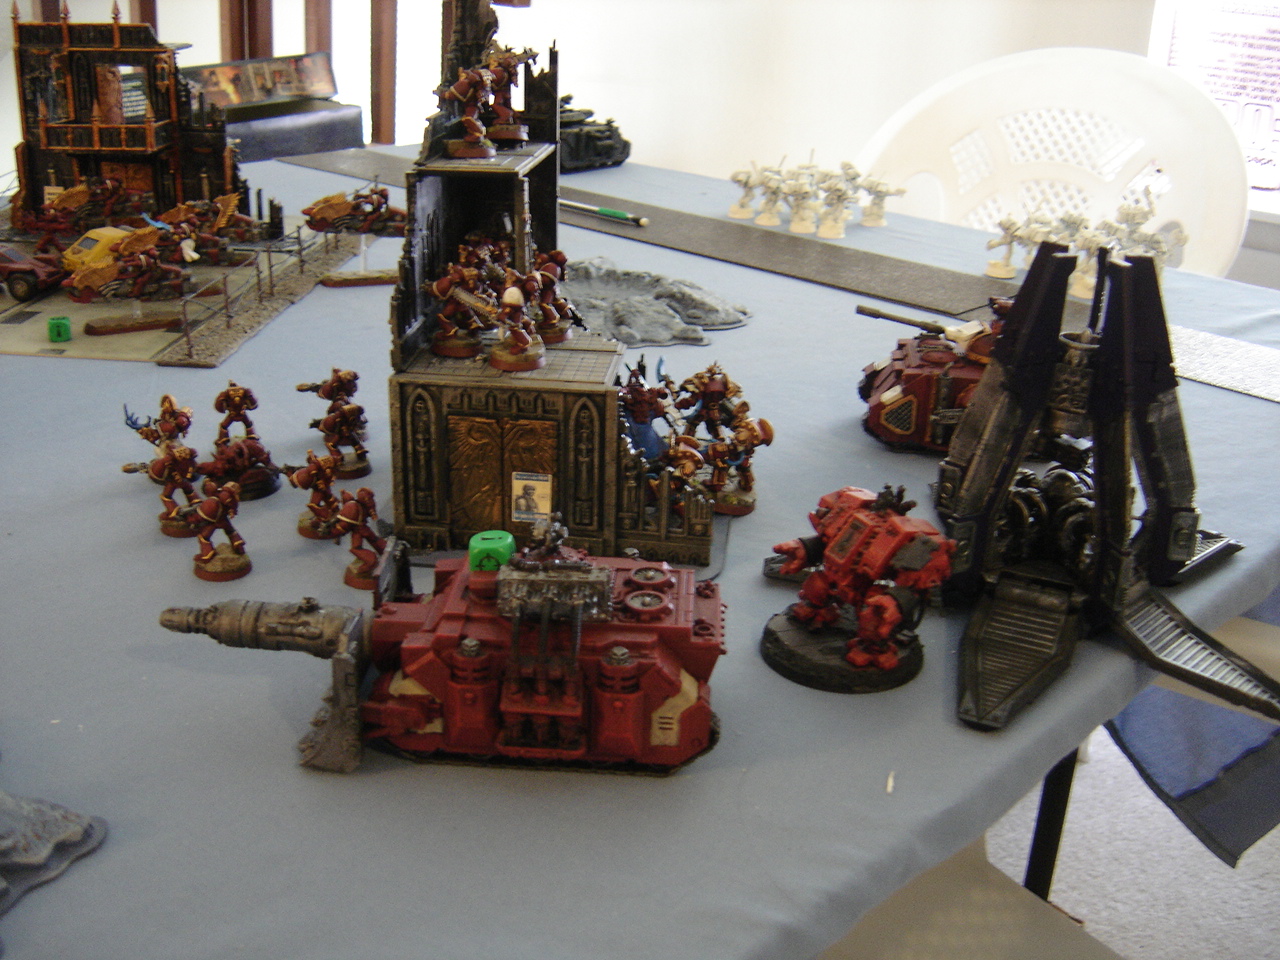
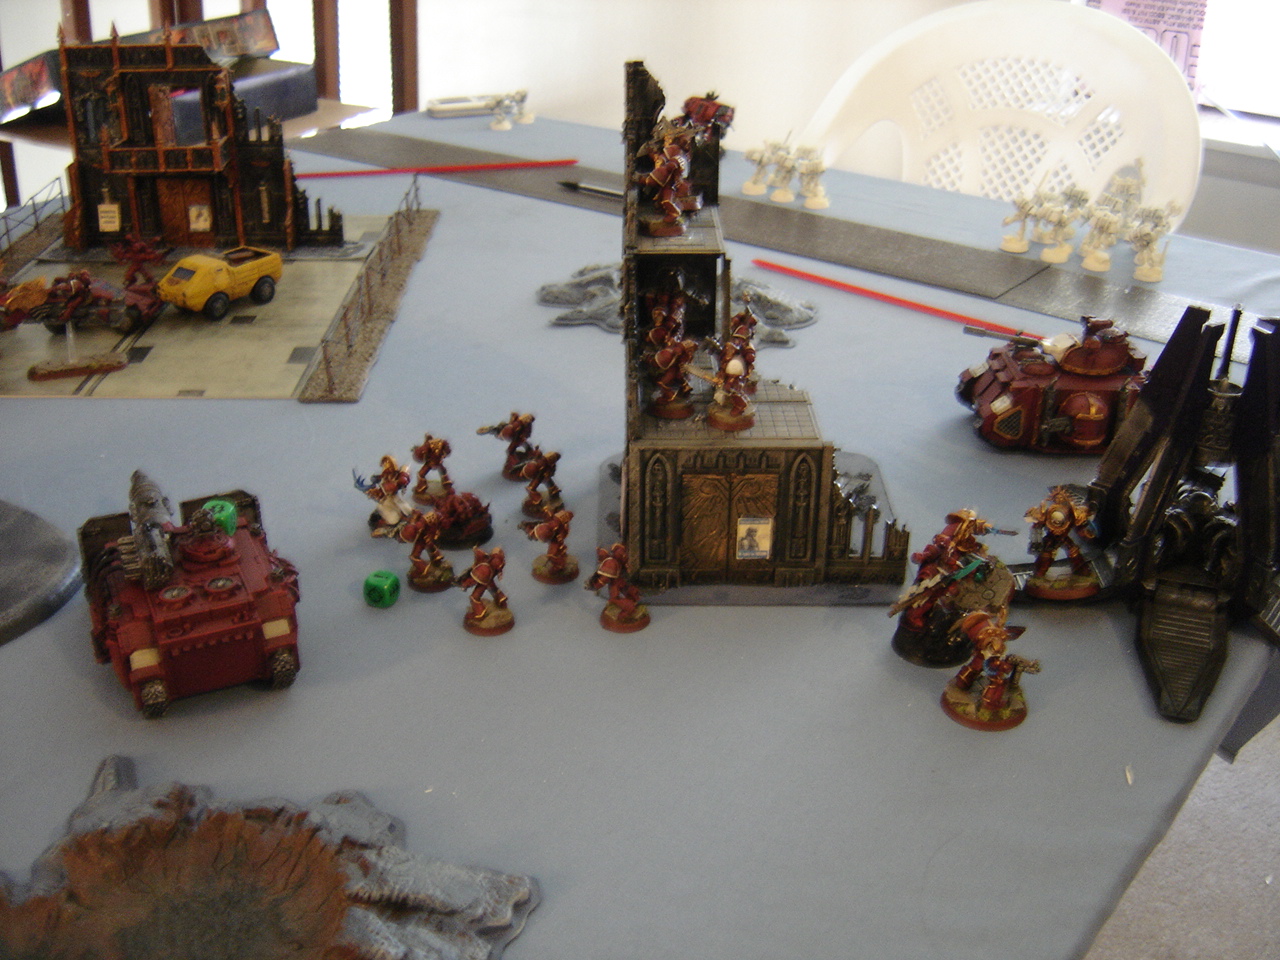
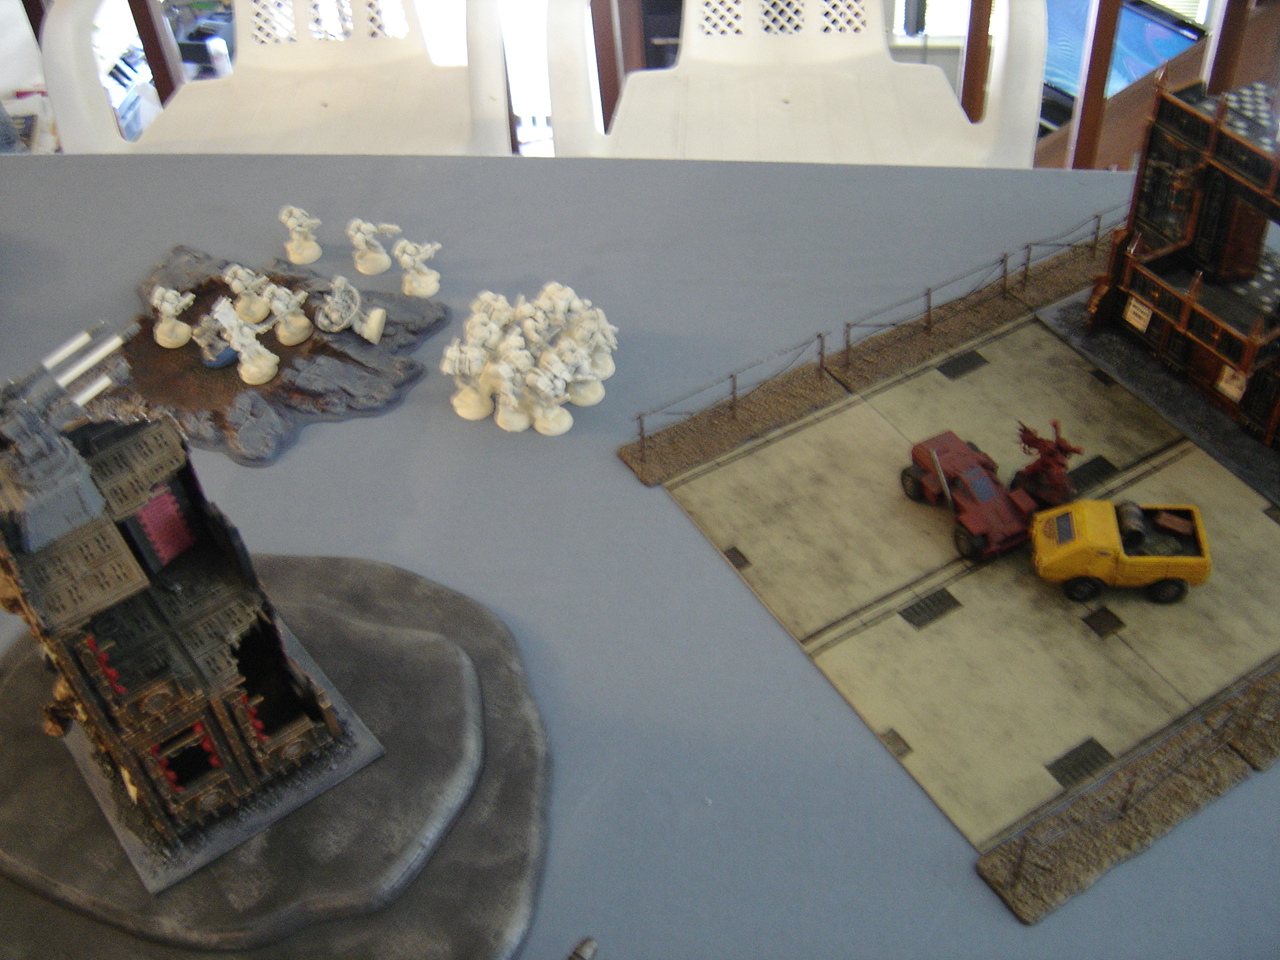
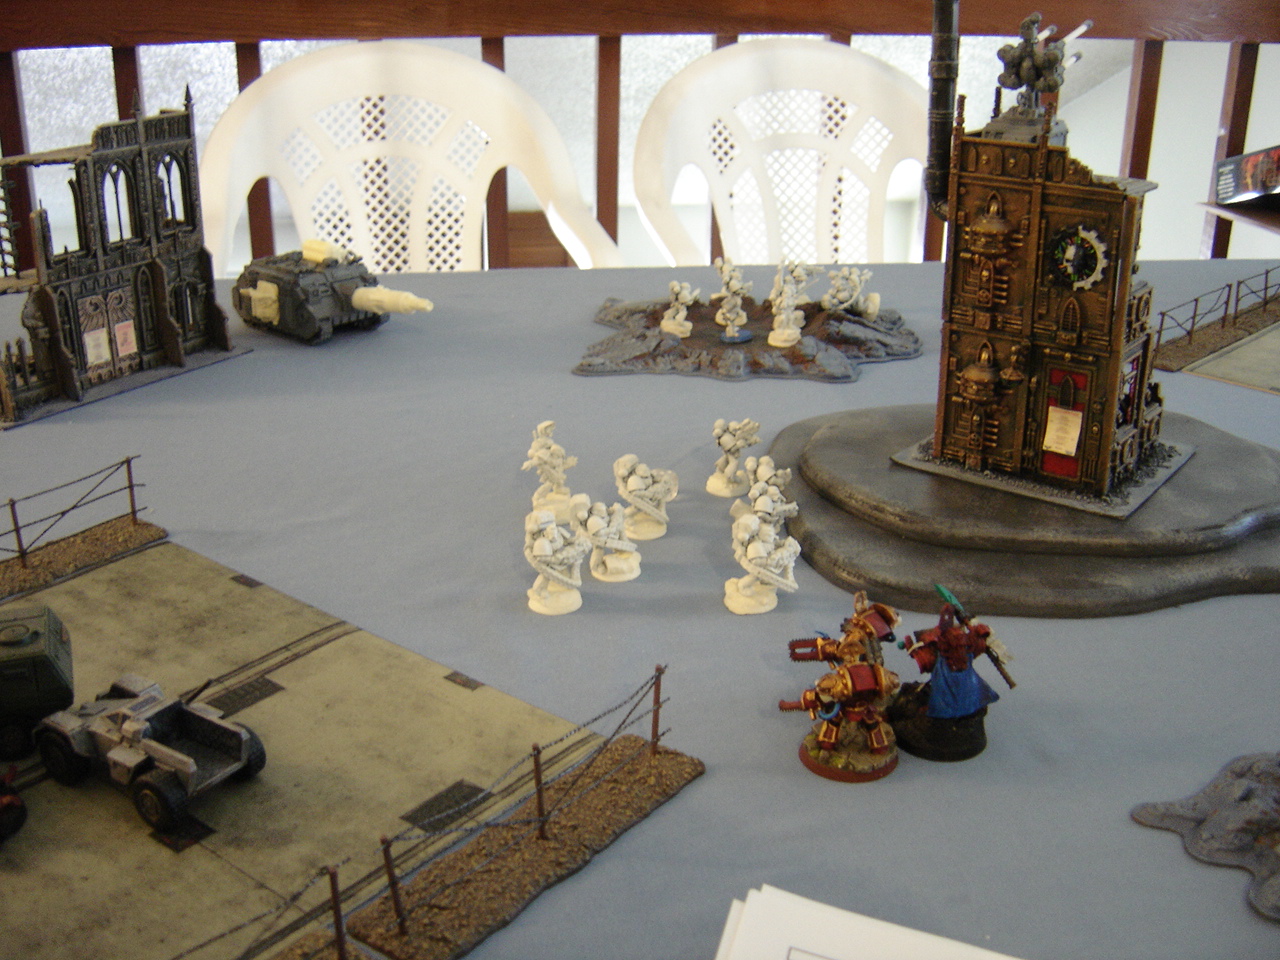
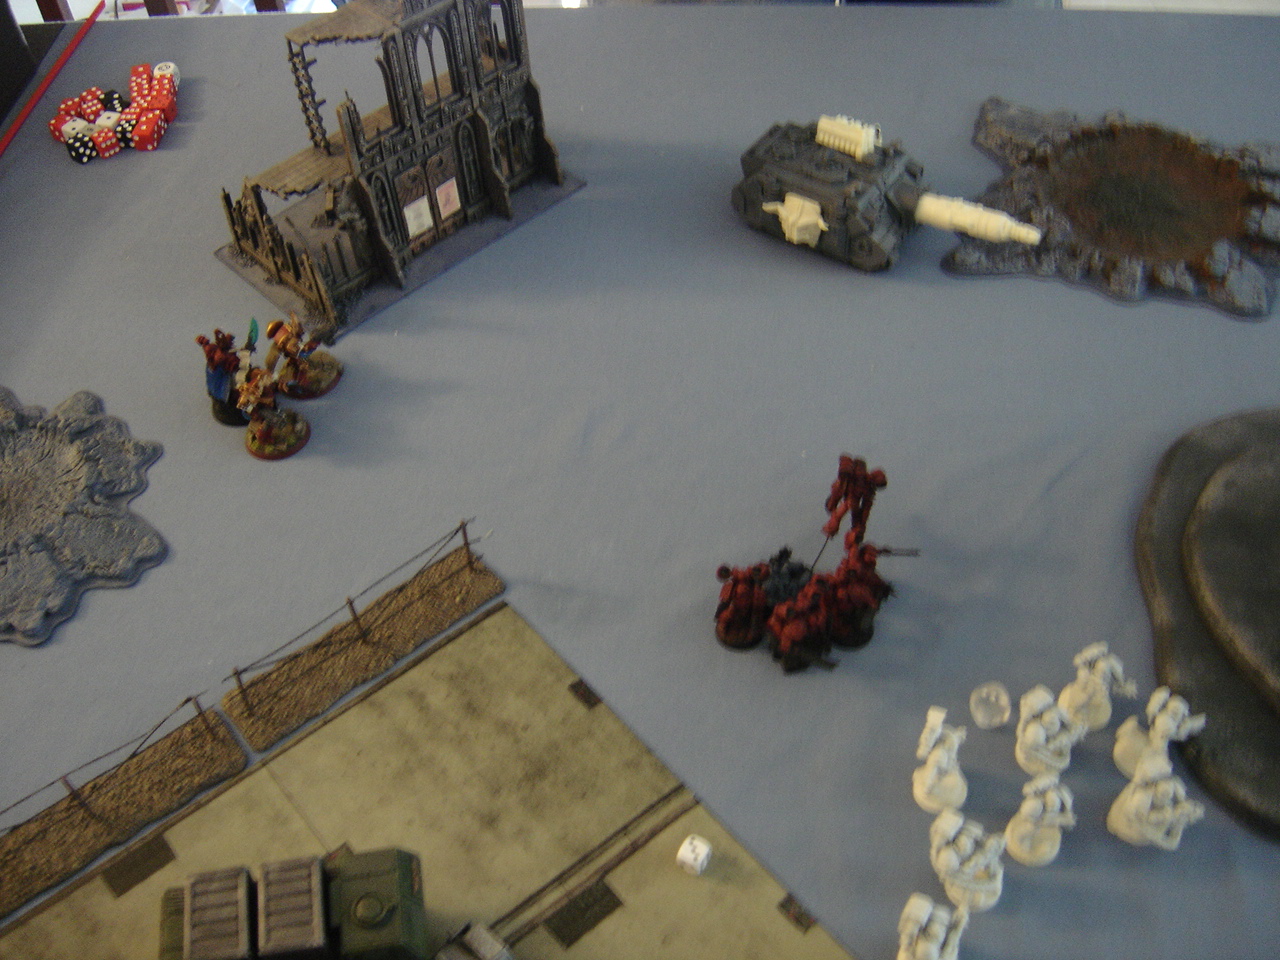
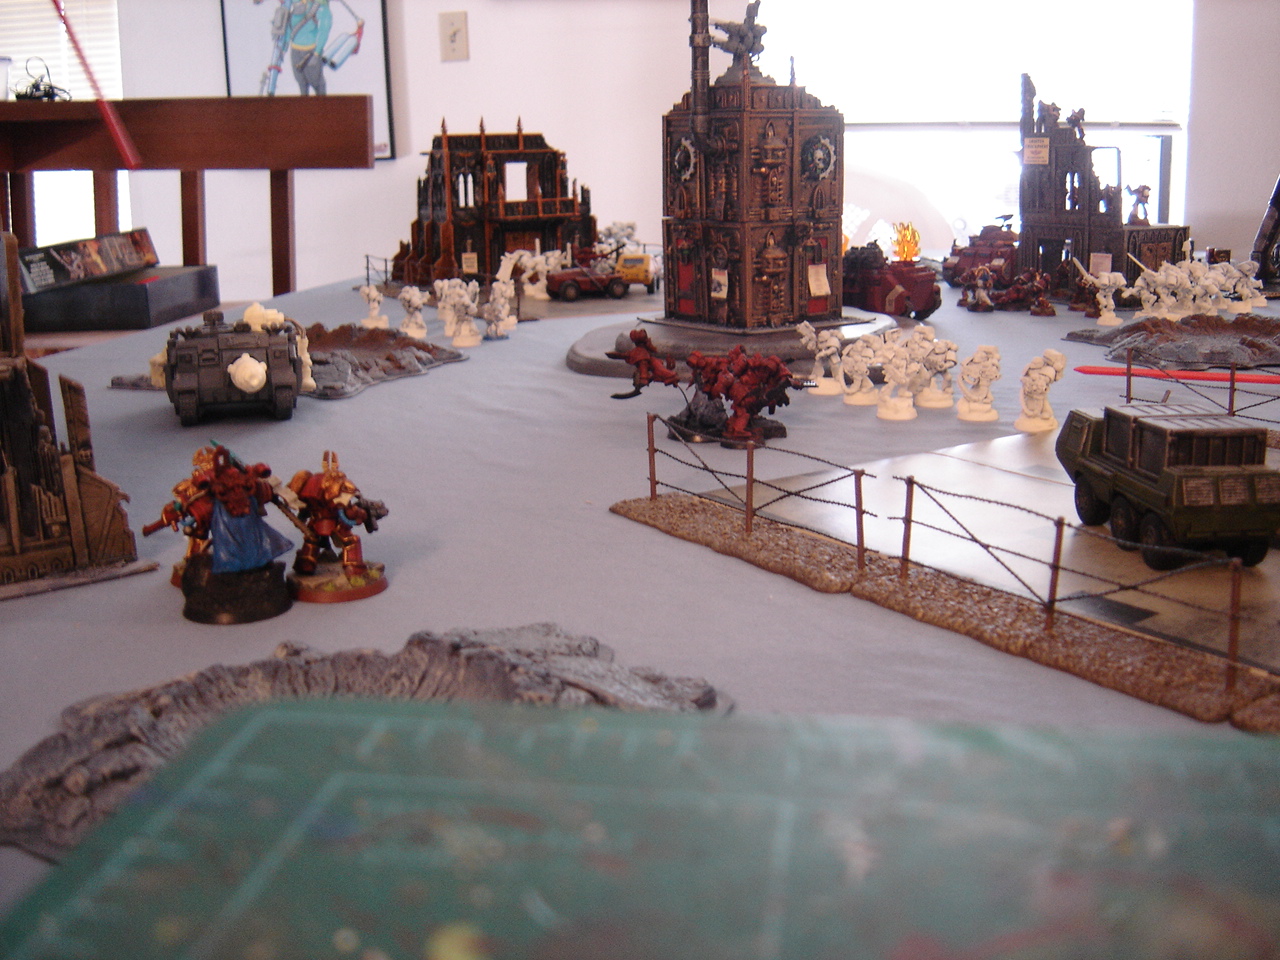
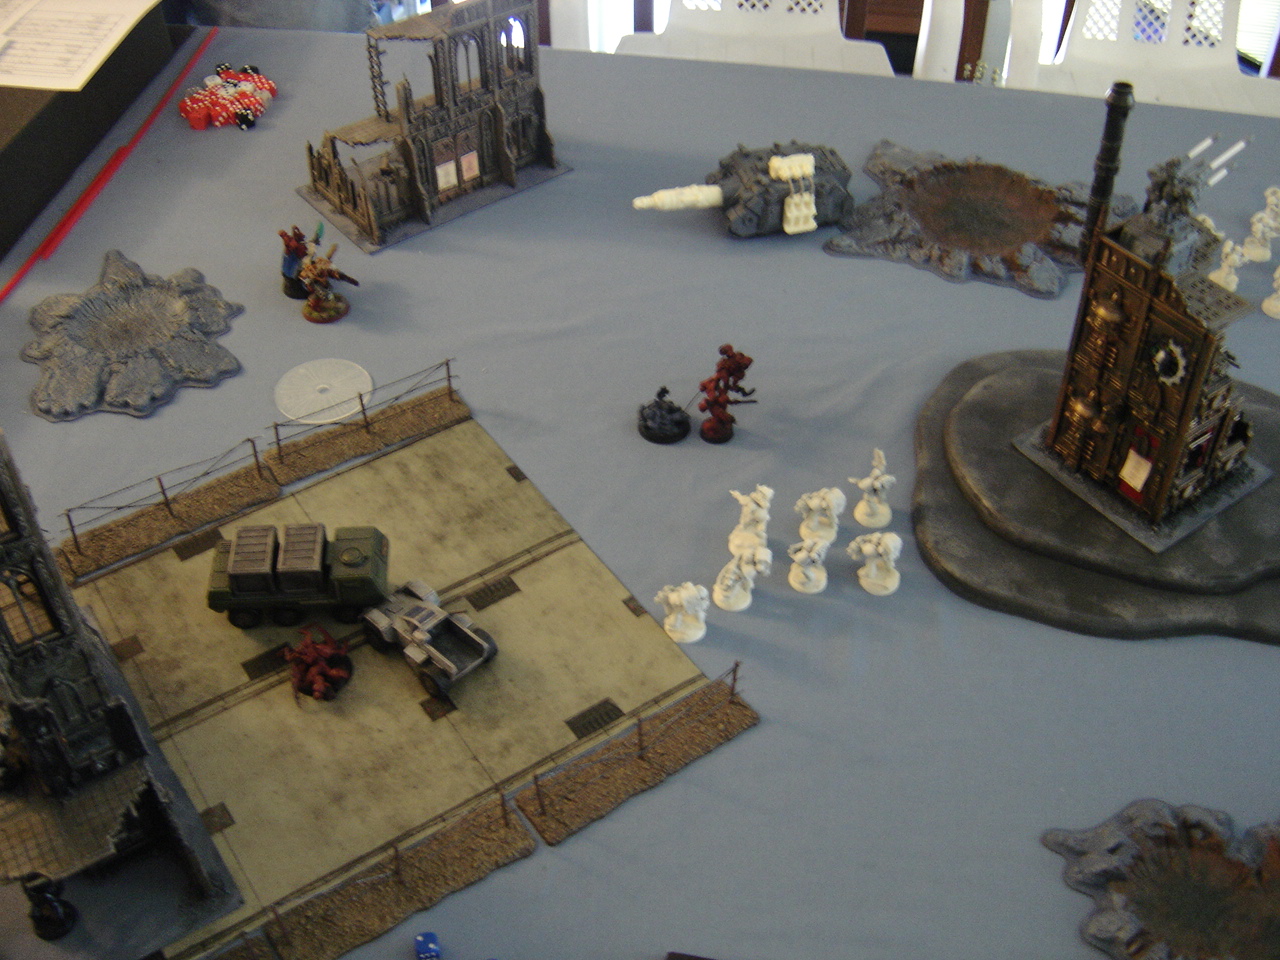
We set up a standard 6'x4' table, and I tries to simulate the terrain setup based on pictures from previous events. Compared to my usual style of setup, the table seemed really barren so I added a couple craters and fences just to give it a better look. We rolled off and got the spearhead deployment (table quarters) and 4 objectives with the Seize Ground mission. An interceptor gun in the center counted as the first objective, and the remaining objectives were represented by a trio of Flesh-changed Thousand Sons that I'd banged together out of some Possessed sprue leftovers.
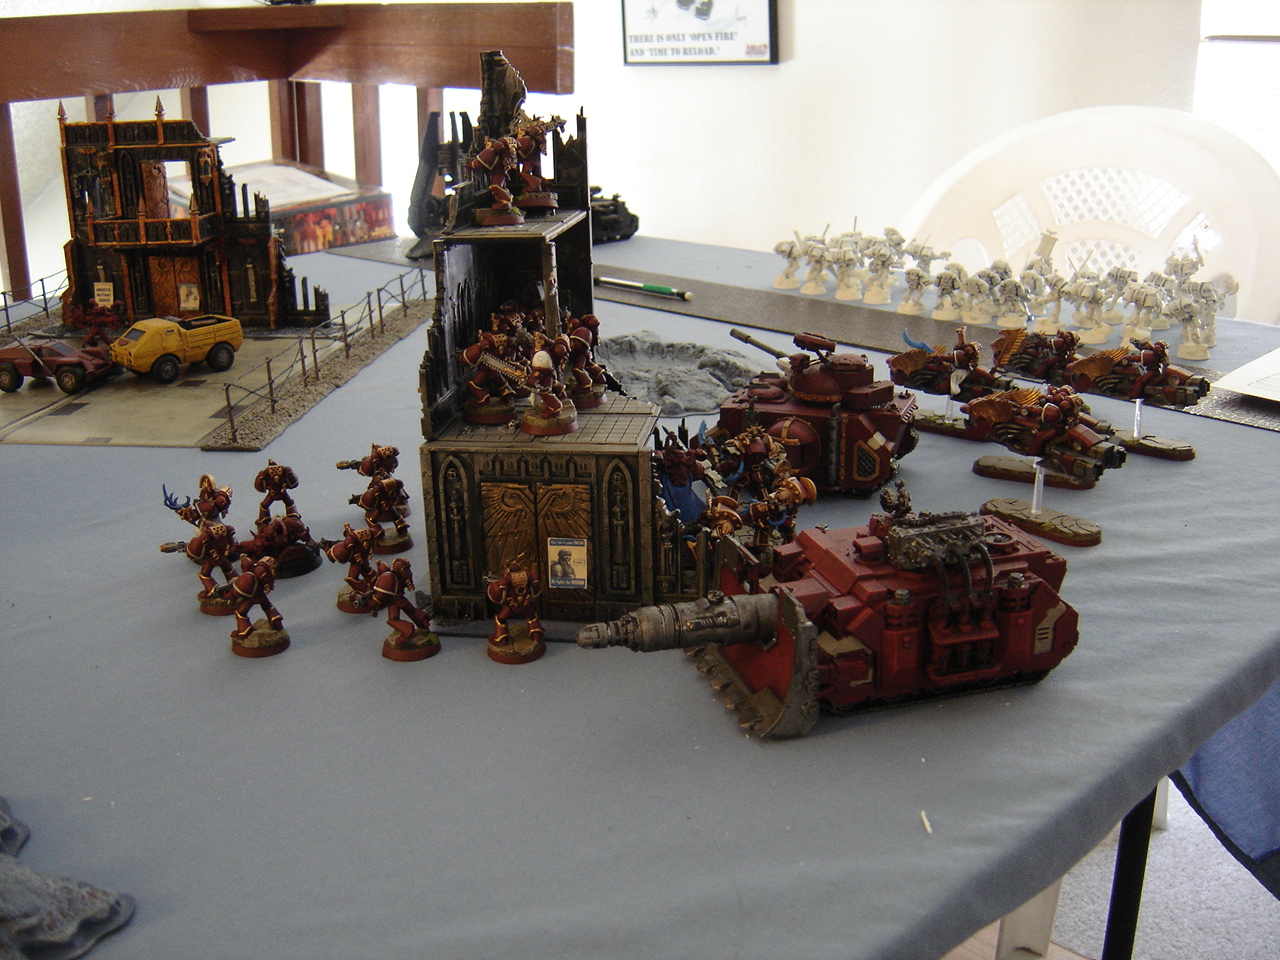
The Thousand Sons castled up around one building and objective on my right flank, while the Blood Angels gathered around the leading edge of his deployment zone, eager to get to grips with my army. We each had a number of units in reserve, and both happened to take our Sabre Tank Hunters. Looked to be a duel of the big guns on that front!
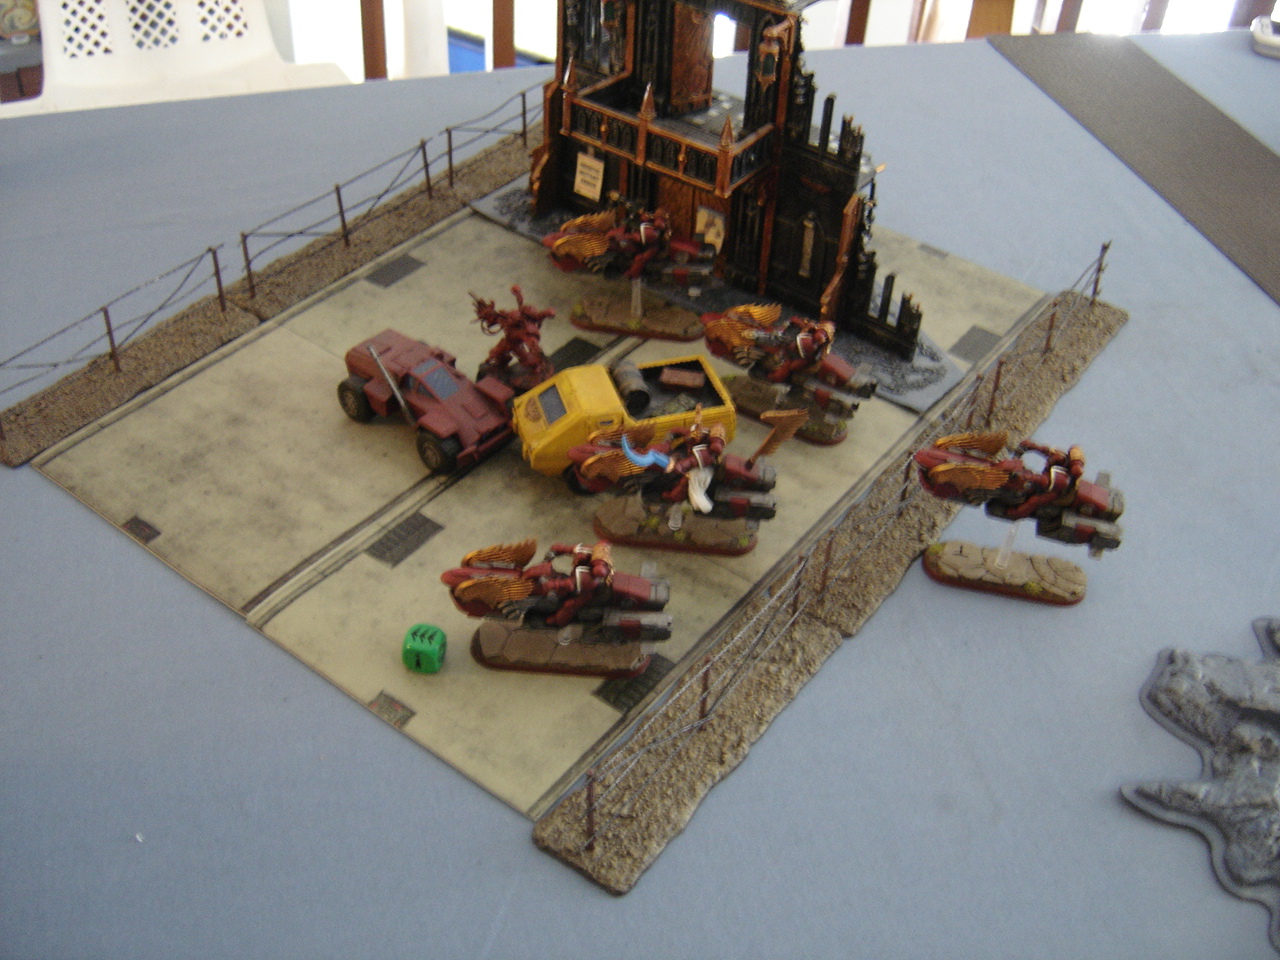
In my first turn, the Jet Bikes turbo boosted forward to contest one of the objectives on the far side of the table. My intent was to use their Locator Beacon in combination with the Sorcerous Portal psychic power to teleport a Tactical squad over and hold the objective, but due to poor deployment on my part, this didn't actually work out as planned. On the other hand, that's exactly the sort of thing we were playing this game to discover - what works, what doesn't, what needs to happen in what order, etc.
In the Blood Angel's turn, he managed to get a Furioso in my backfield via drop pod, and with a combination of magna-grapple and meltagun blew the Sabre's cannon apart. Left with no weapon, it was relegated to mobile cover status for the remainder of the game. In retaliation, Ahriman and his bodyguard of chainfist-wielding Terminators managed to destroy the Furioso. Mostly lucky dice on my part though, that combat could have easily gone the other way!
A squad of Blood Angel assault marines did a pinpoint drop and in a single round of shooting managed to completely annihilate the jet bikes. A unit that I'd just finished painting the day before and that I was rather proud of, washed off the table in the second turn. Seems like that's how it always works!
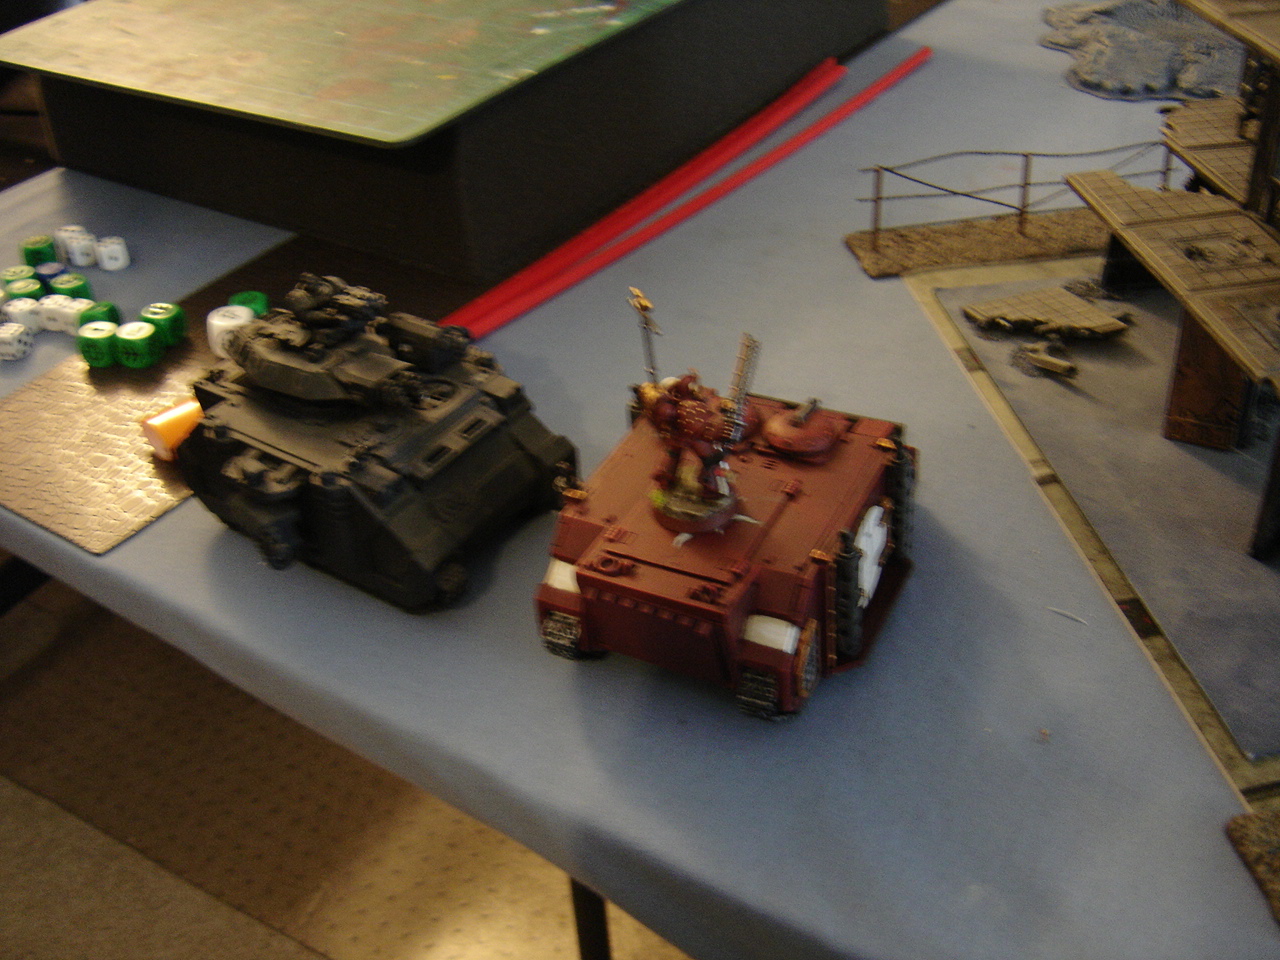
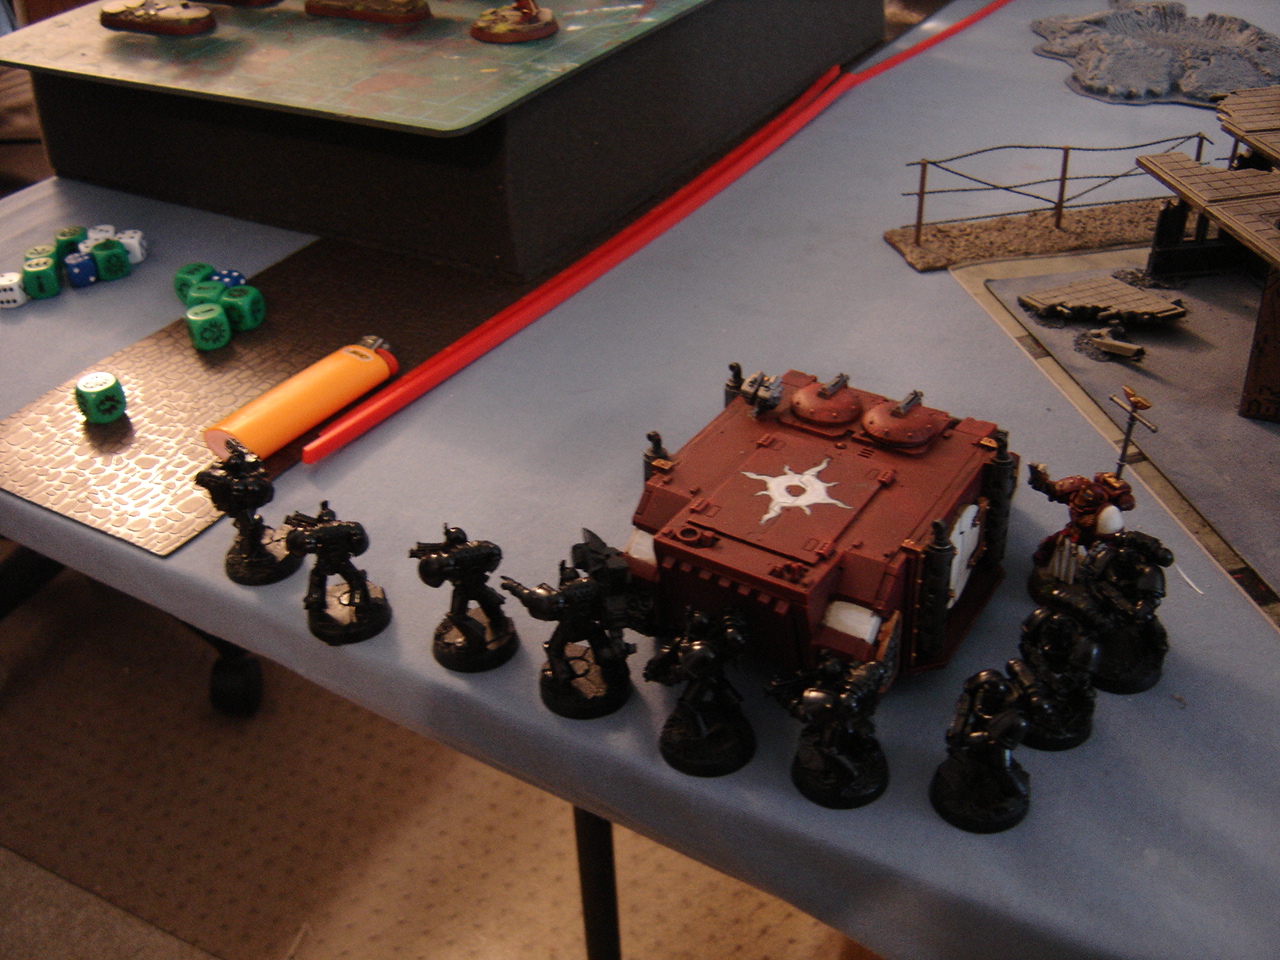
On the heels of that devastation, he also Outflanked with his Baal predator, right into the side of the rhino carrying my second tac squad. Tzeentch was with me however, and he failed to damage the rhino with the assault cannons, heavy bolters or the storm bolter. In the following turn the tac squad disembarked and got a lucky shot in with a krak grenade in the assault phase (after the meltagun missed from an inch away), destroying the Baal, much to his surprise.
Ahriman used his Gate of Infinity power to pound forward, and weathered an absolute HAIL of fire from the heavy bolter-toting devastator Squad, absorbing something on the order of 20 hits for the loss of a single terminator. The intent was to continue to bound forward and get the chainfists into contact with his Sabre in a subsequent turn.
The Blood Angel assault squad continued forward, valiantly holding their ground and perfectly executing a Death or Glory attack on the neutered Sabre which attempted to Tank Shock them. Melta bomb, max penetration roll, 6 on the damage chart. Kaboom!
Tzeentch's favor turned against me for the remainder of the game unfortunately. Ahriman and his terminators scattered 11" away from their intended arrival point, putting them well away from their target. I forgot the Thousand Sons assault veterans could use Heroic Intervention, so instead they landed and completely failed to damage the Devastator squad that was their target with some desultory bolt pistol fire.
The Blood Angel Sabre pivoted to bring its Neutron Laser to bear on Ahriman, and the devastators casually spun in place to mow down the Thousand Sons assault squad. Another terminator was reduced to molten slag, and nearly all the assault marines were cut down in a hail of heavy bolter fire.
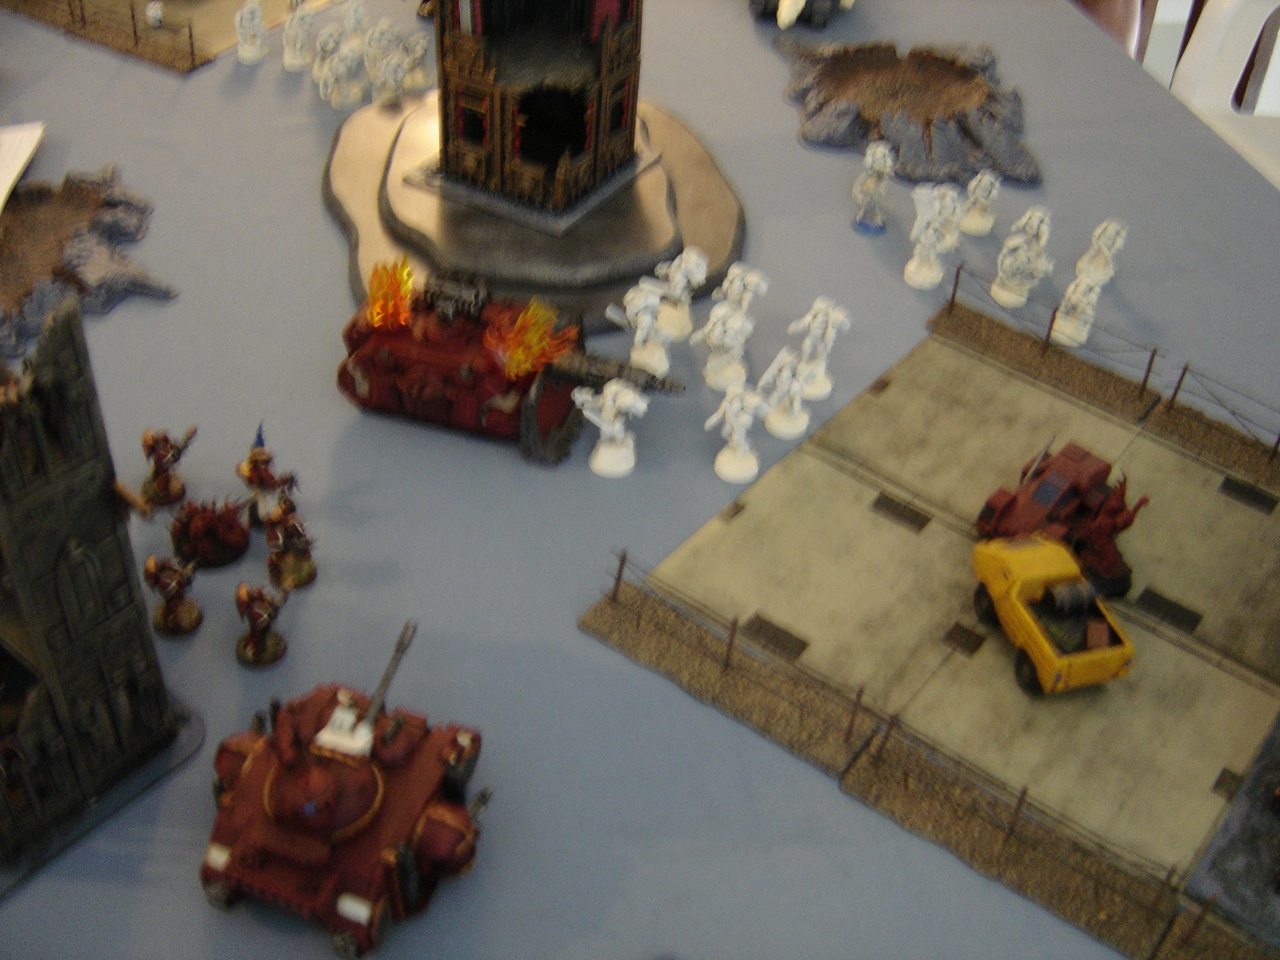
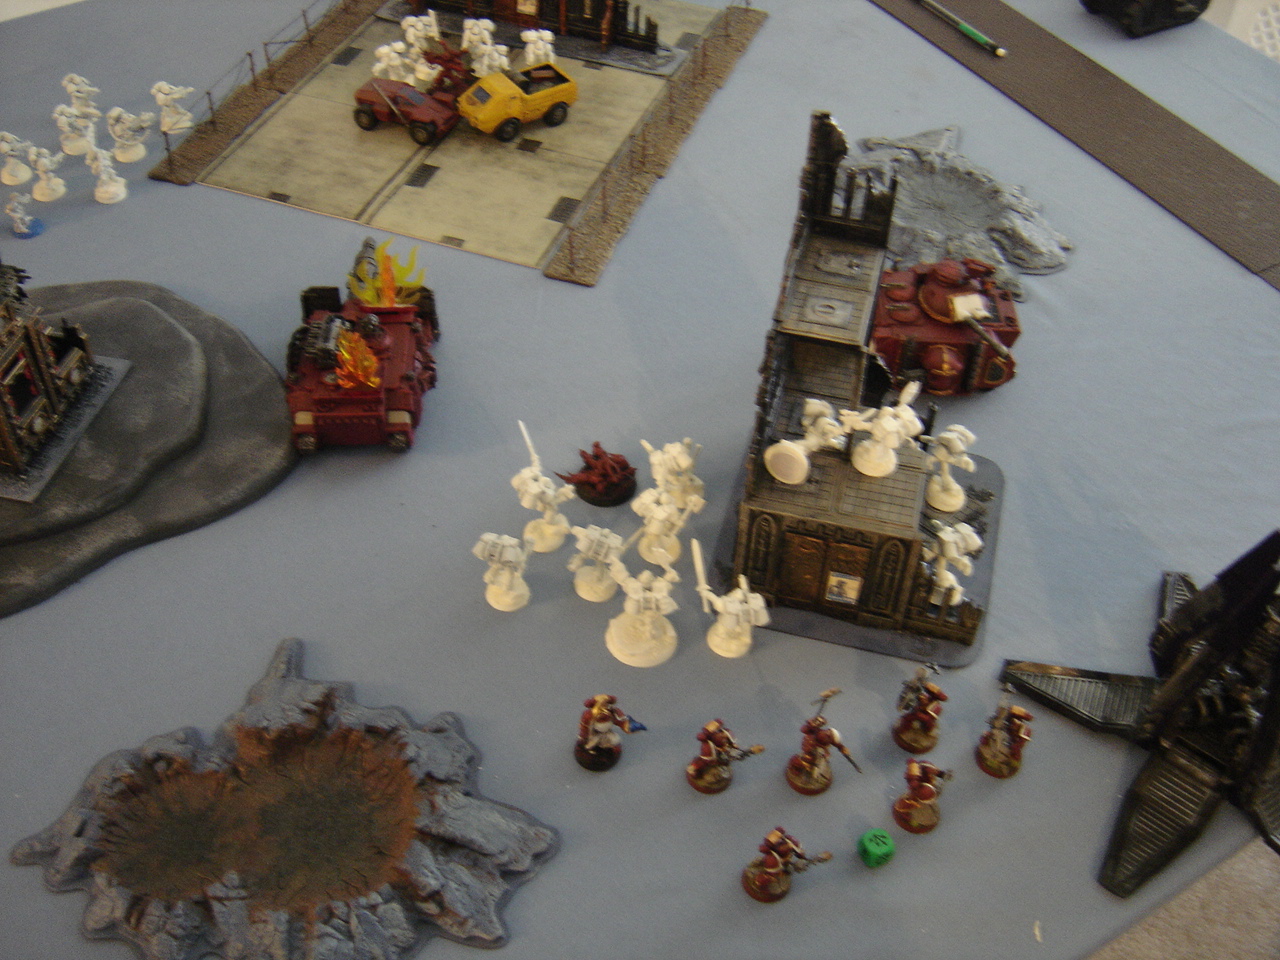
The slaughter continued on the right flank. The Blood Angel's last assault squad had been lurking in reserve for three turns but finally was able to enter the fray, dropping into the backfield - another thing that I failed to do during the game was to destroy the drop pod, whose locator beacon allowed the assault squad to come down with pinpoint accuracy. Doh! The squad did massive damage to the Thousand Sons investing the building, and they broke and fled from their assault.
At that point we had to call the game at 2 hours. Well, technically we managed to get 4 full turns done in 1 hour and 50 minutes which we both agreed was a bit too slow and was a function of not knowing the lists as well as we needed to. Not too bad though - with a little practice and some cheat sheets to help me remember what phases the numerous psychic powers need to be done in, we should be able to bring the time-per-turn down to the point it needs to be.
The end result was a complete and utter Massacre of the Thousand Sons. Given another turn I may have been able to take one of the objectives on the left flank that was more or less unguarded, but the Blood Angels had two objectives in hand and uncontested. Not the most auspicious beginning for the tabletop career of my Thousand Sons, but I claim a moral victory as nearly all of my models were painted (or at least had SOME paint on 'em)!
Labels:
Battle Reports,
Horus Heresy,
Thousand Sons
Wednesday, September 21, 2011
Heresy Era Thousand Sons - You've got red on you...
The Shaun of the Dead quote is apropos for this post! A couple readers have asked how I do the red on the Thousand Sons, and as I had a free evening yesterday I documented the process - hopefully it'll be of use!
To start with, this is my work area. I usually paint 10-20 miniatures at a time, so I'll lay out what I have in a semi-ordered grid, and pull out all the paints that will be going on them. In the back of the first picture you can see all the various colors that go into the Thousand Sons. Between each major color I'll change out my rinse water - I use a pair of cheapo plastic containers, for a basic two-rinse system (first rinse gets rid of the majority of the paint, and the second rinses out whatever's left from the first rinse). I've been using a wet palette for a little while now and I absolutely love it - I used to menace my more painterly friend by painting straight from the pot, but I have to admit, the control and consistency of the paint is so much better with a wet palette. Speaking of travesties in painting technique, those of you with weak stomachs should look away, for these are the brushes I use to paint the red on this army:
The horror! Now to be perfectly fair, these are particularly egregious examples of beaten-up brushes, but for the purposes to which I will be putting them, they really are exactly what I need.
The whole process starts with a Dark Flesh undercoat on the armor plates that will be red, as well as anything that will eventually end up being gold. I find painting gold directly over a black undercoat ends up looking rather patchy, but the red hue of the dark flesh gives any gold applied over the top a nice rich tone. I used the old beaten up Number 1 to block in the color, and I'm not particularly concerned if I get a little spillover, as at the end I go back in with Chaos Black to clean up any place that needs it.
Now that horror show of a tank brush comes into play! [Ominous Horns!] The next step is drybrushing Red Gore onto the models. For the jetbikes and other larger vehicles, I use the big brush, as the splayed hairs add a little bit of a stippling effects which is good for larger smooth areas. For the scouts it's all done with the same #1 used in the basecoat. In the pictures above you can see a basecoated model on the left, and the Red Gore drybrushed model on the right. At this point I'm giving the entire basecoated area an even drybrush, to bring the red up a bit overall. Interestingly enough, it turns out that painting the initial basecoat of Dark Flesh actually takes longer than the rest of the red steps combined - once you make it to this point, rest assured, the end is near!
An overhead shot of the group shows how the Red Gore brightens up the whole unit. The next step changes things up a little bit and really helps the models start to come into focus.
Next up is a more directed drybrush of Blood Red as shown on the right of the pictures as compared to a model from the previous step on the left. In general I follow a process similar to the Zenithal Highlighting tutorial that Ron at From The Warp posted recently - I just didn't know there was a name for it! Essentially, before drybrushing the Blood Red on, I take a look at the model from above and focus the drybrushing primarily on the parts that I can see from that vantage. As that's where the light source would be coming from, those planes and angles get the Blood Red treatment, whereas the underside relies more on the prior Red Gore drybrush and Dark Flesh undertone.
I tried to get a decent shot of the model from a couple angles to show what I mean. The upper planes of the marine's armor and the jet bike are a fairly bright red, whereas the underside is a bit more shadowed, though still distinctly red.
The units are significantly bright at this point, and would be more or less where I'd stop if I was doing Adeptus Mechanicus or World Eaters. I'd probably do one final light highlight of Blazing Orange on the extreme edges in that case. However, it's time to bring it all down a bit and tie it together instead!
The next step is a Baal Red wash over the entire red area. In general I start at the top and work my way down the model. The wash takes longer to dry than the paint, so definitely give it time to completely dry before moving on to another step. In the pictures above, the models are still a bit awash with, well, wash which I'll go in with a clean brush and absorb as needed.
The group shot shows them all drying, which is where I left off for the evening. I usually let the washes dry for an hour or more before I work with the models again, but at this point it was time to call it a night. Hopefully that info is helpful, the process is really rather simple, but it seems to result in a neat look in the end. It's definitely messy though, suffice it to say my fingers, knuckles and a fair bit of the painting station were all various shades of crimson by the time I was done!
This morning before work I had an hour to mess around so I went in and added the Graveyard Earth to the bases, and anything that will end up being cloth on the models. The dirt and cracks in the paving stones were given a pass of Devlan Mud, as were the cloaks on the Scouts (they'll be getting a camo pattern to match the bases, as seems appropriate.
One further little update -I'd finally gotten around to building the bottom section for the faux Dreadclaw Drop Pods, and I got the initial metal colors onto and affixed in place. I made sure to find bits that I knew I had plenty of, so I could replicate it on the other one I've yet to build.
Wow, that was a long one. Thanks for reading!
Labels:
Conversion,
Horus Heresy,
Jetbikes,
Scouts,
Thousand Sons
Subscribe to:
Posts (Atom)






.JPG)


