Sunday, December 27, 2009

Holiday Reinforcements - More Mechanicus Madness!

It's been rather cold and snowy here recently and I needed to take a breather from painting, so I thought I'd take a spin at building or converting something. To that end I decided to see if I could whip up something suitable for the Myrmidon Assault Engine described in the Ad Mech codex I'm using. I cracked open the Robogear box I received earlier last week and pondered the contents:


The model is in a slightly larger scale than 40k, it appears the pilot would be about half-again as tall as a guardsman. However, my hopes that it would be similar in size to a Defiler were not to be realized. No matter, the Myrmidon is described as being slightly smaller, more on par with a Penitent Engine or War Walker. The basic Myrmidon is armed with a twin-linked Autocannon and a pair of Dreadnought Powerclaws. As an option, it may replace one of the Powerclaws with either a Conversion Beamer, a Graviton Cannon or a Shockwave Cannon.


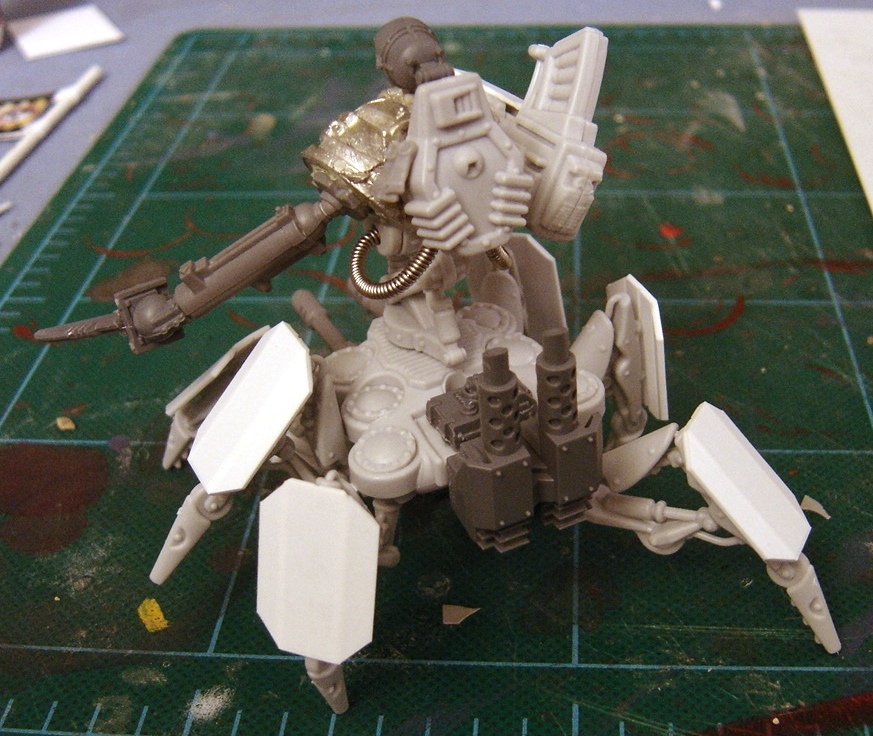
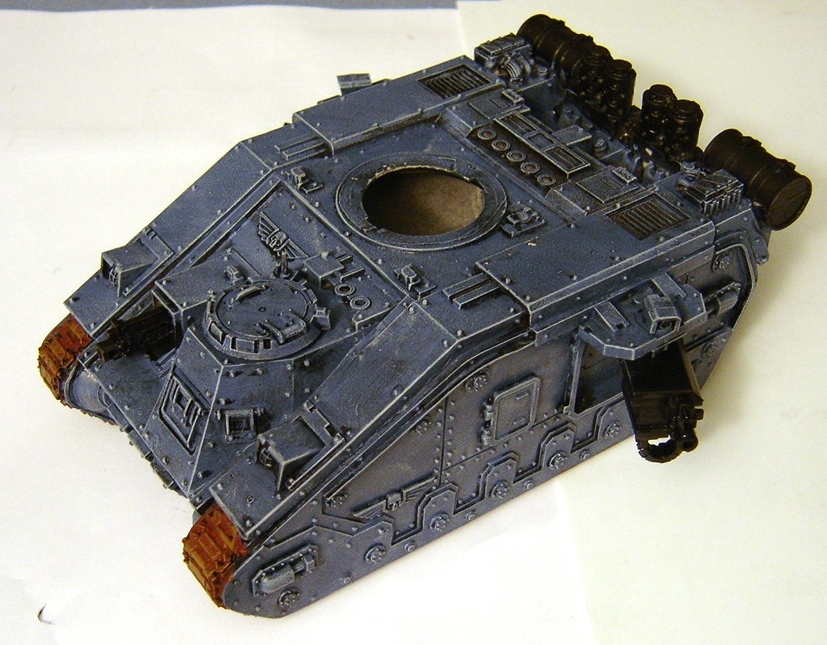
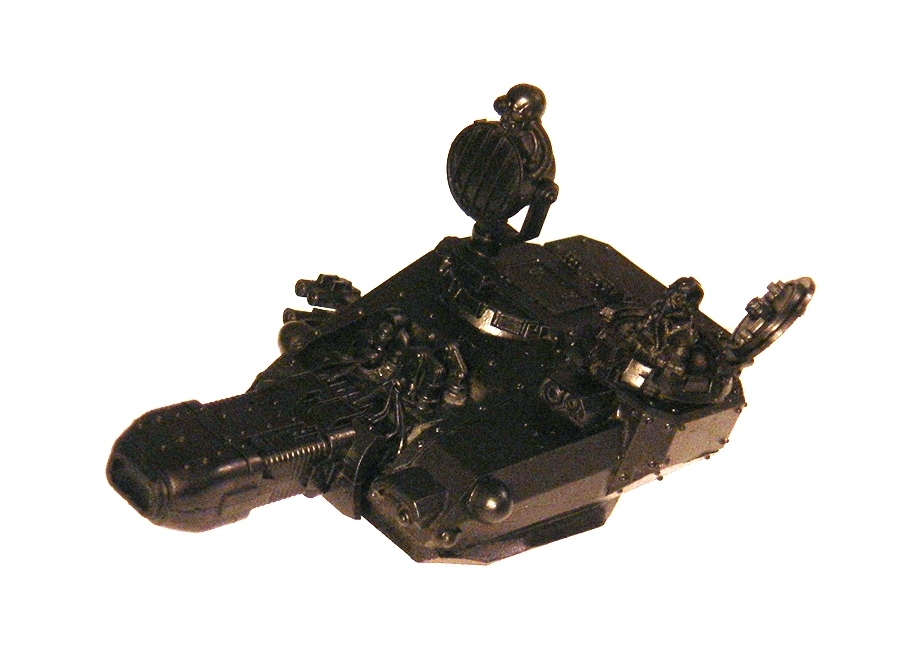
I rooted around in the bits boxes for inspiration, and came up with an old set of Starship Troopers "Grizzly" armor which I used for the torso. I like the helmet's look, as it's vaguely Roman with the T-shaped visor. A friend suggested that the legs left uncovered seemed a bit too spindly and "un-Imperial", so I whipped up some armor plates to bulk them out a little. It also hearkens back to the Defiler style plating. I decided to add a weapon from the Robogear sprue to act as a representation of one of the various upgrades.


I utilized some leftover bits from a Sentinel for the engine, and fitted it with an underslung twin-linked Autocannon taken from the innumerable Guard heavy weapons sprues I have lying around. The Powerclaw is fashioned from a Mortar, one of the lasrifles from a Chimera, an Autocannon ammo drum, and a couple blades from a Defiler leg. As I purchased two of the Robogear Spider models, I took care to use parts that are easy to find in my bits boxes, which will allow me to build another one of these almost exactly like it (though I may opt for a different weapon loadout).


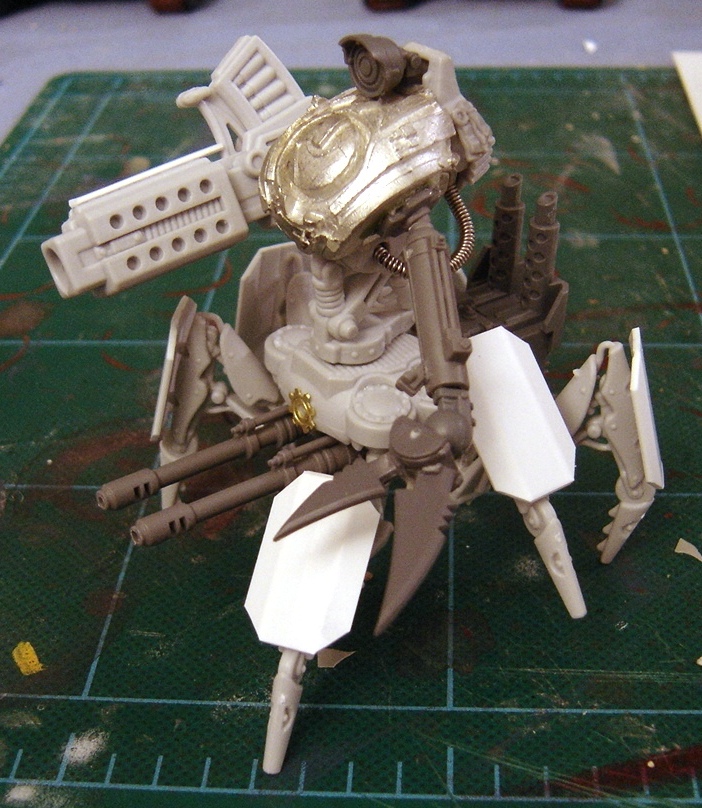
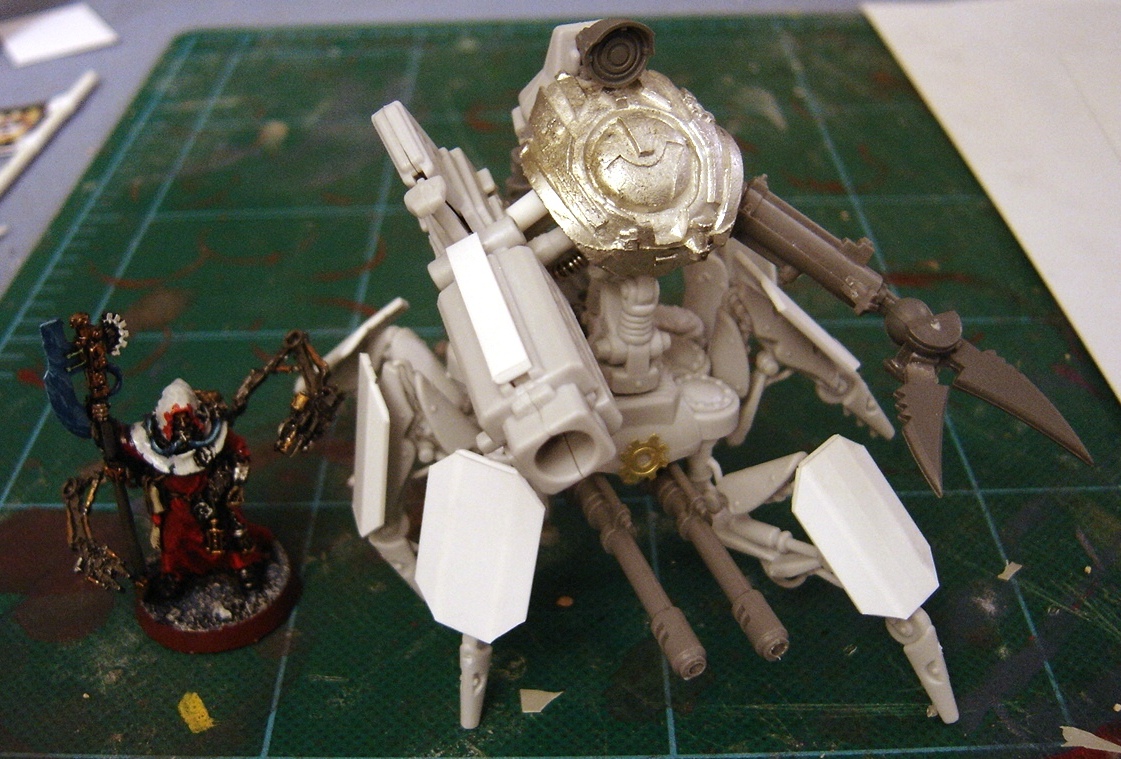
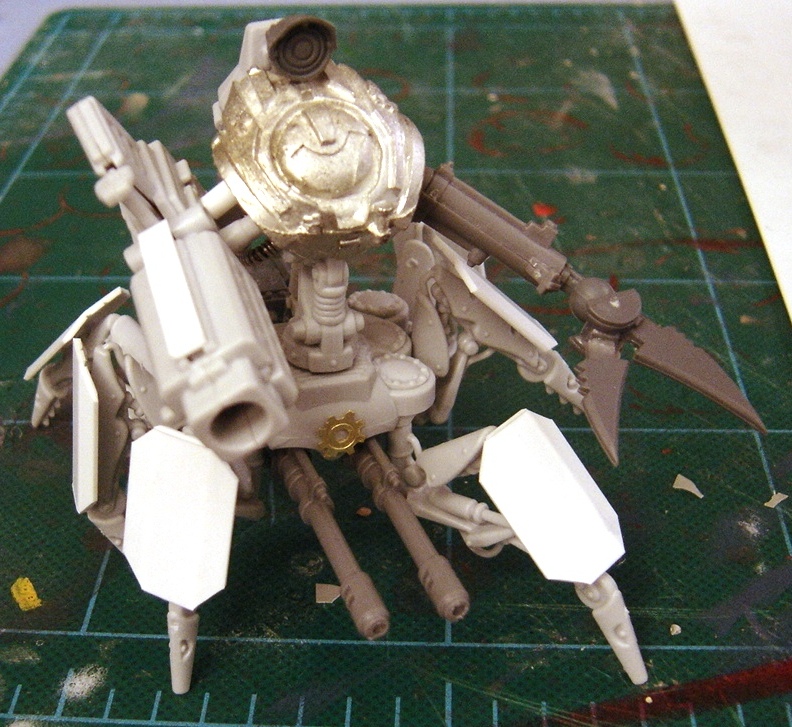
It ended up being a fairly good-sized model, it's a bit taller than a marine dreadnought and significantly larger in diameter. I am somewhat stymied on what to do for a base however - The footprint is far too large for a 60mm base, but a CD at 120mm seems too large. I'm leaning towards leaving it un-based unless I can find an interesting 100mm resin base somewhere...

But wait! There's more!

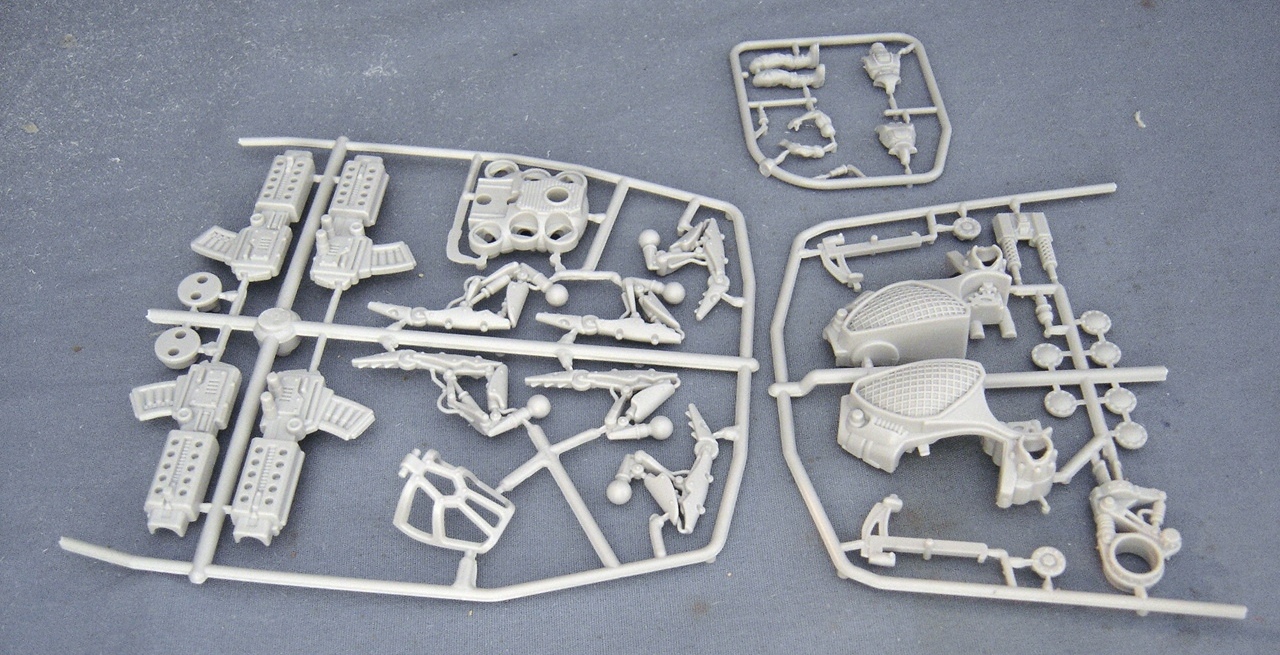
I'd sold off a few superfluous models prior to Christmas and decided to use some of those funds to pick up another Knight Paladin made by a chap in Monaco, figuring it would be well after the holidays before it showed up. I was amazed at how quickly it arrived however (exactly a week from when I purchased it), and I was thrilled with the contents of the box. While I liked the sculpt of the first Paladin, and I'm well-pleased with it overall, I felt that this new one more closely captures the look and feel of the original Epic-scale models. After a session with the Dremel and a nice wash I set to building it.


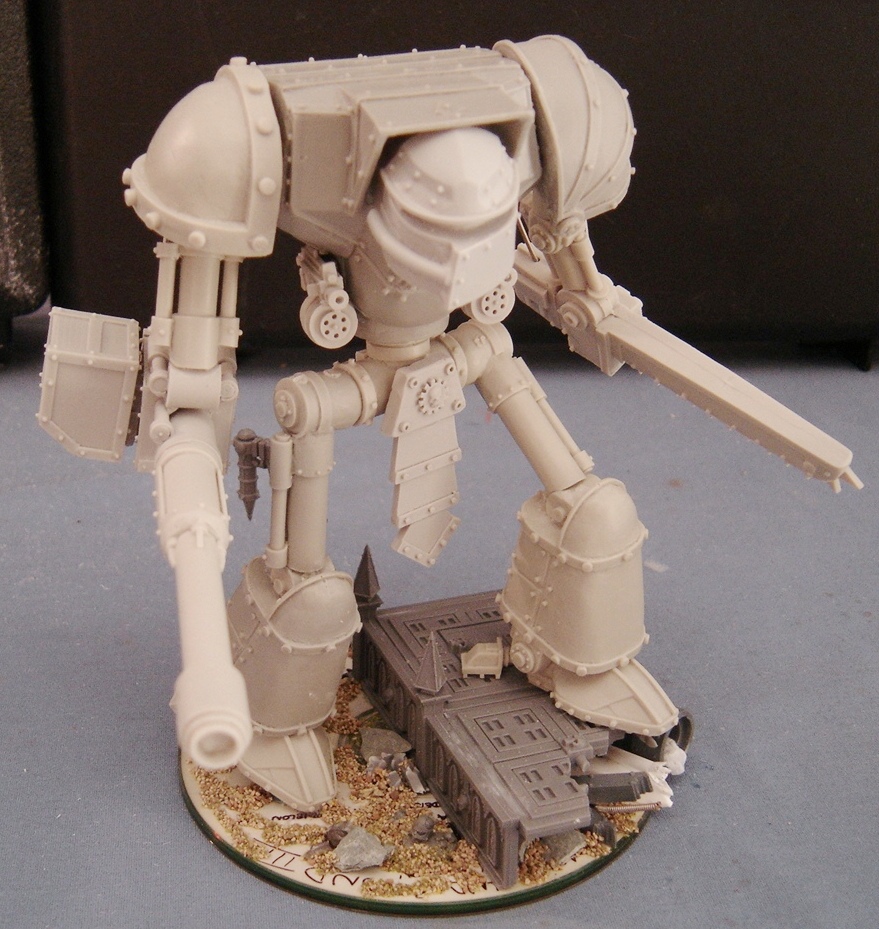
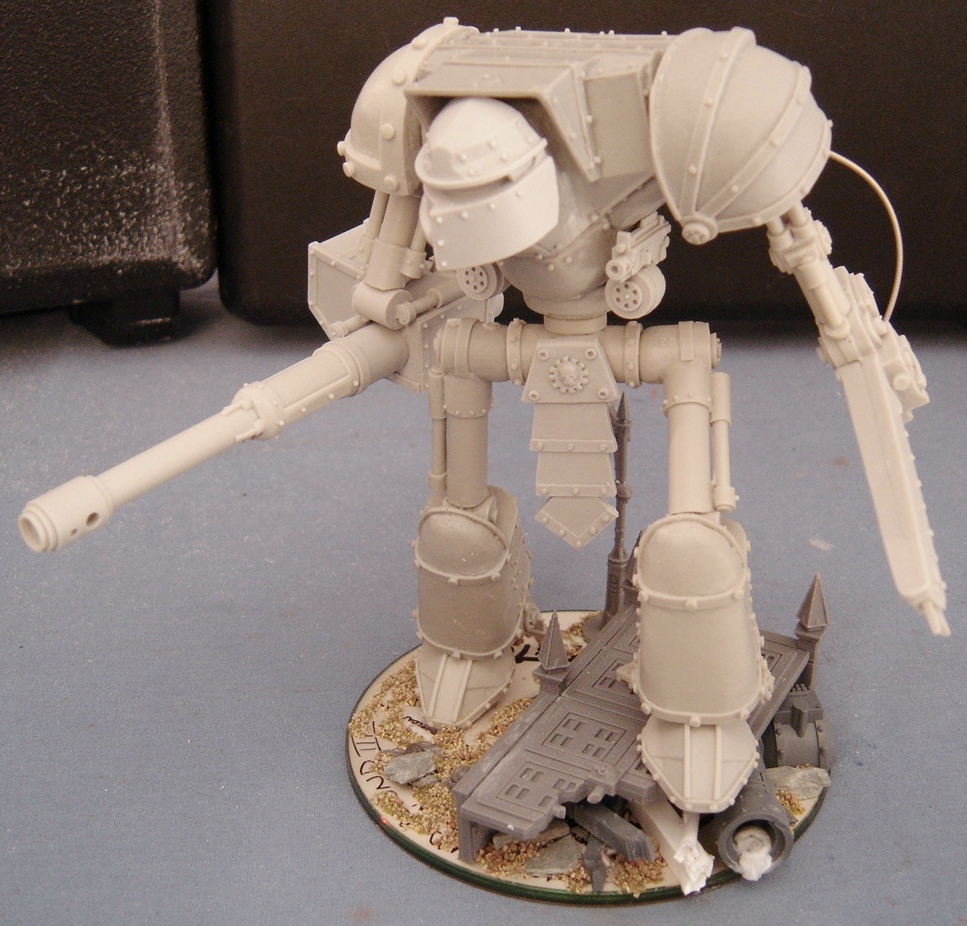
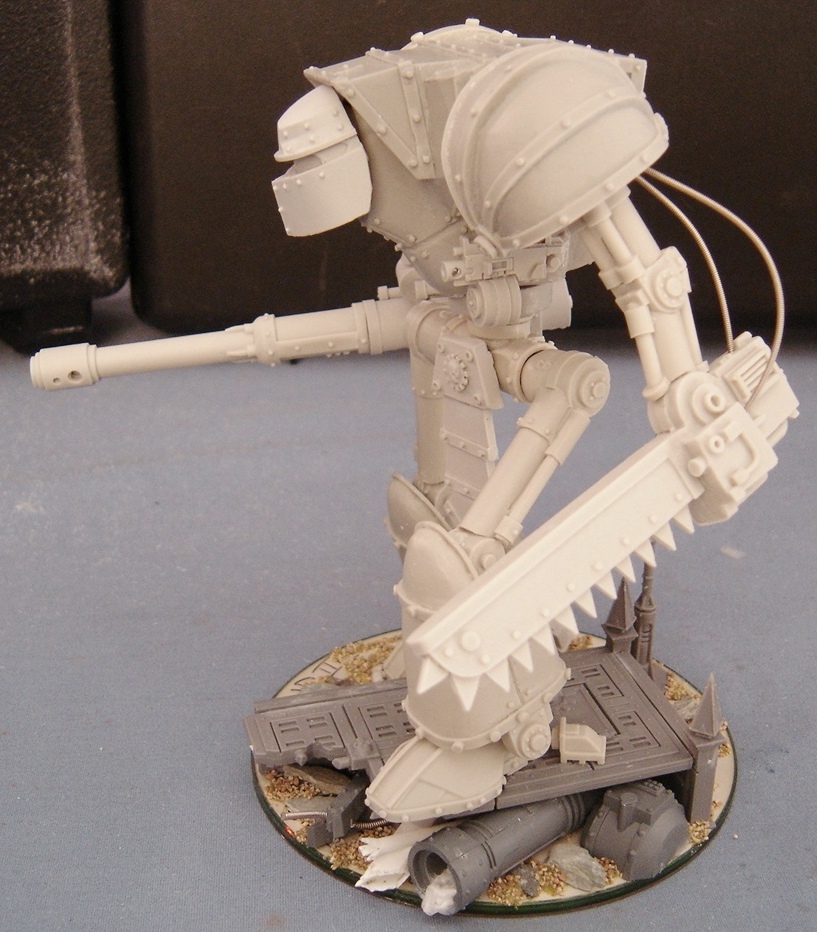
I decided I wanted to do something a bit more structured and interesting with the base and rooted around in the Cities of Death bits to make a ruined step, with some miscellaneous piping and whatnot exposed beneath. I made some slime dribbling out of the large pipe using white glue and dripping superglue onto the top of it. The superglue reacts with the water in the white glue and it shrivels as it dries, forming a bubbly, ooze-like finish.


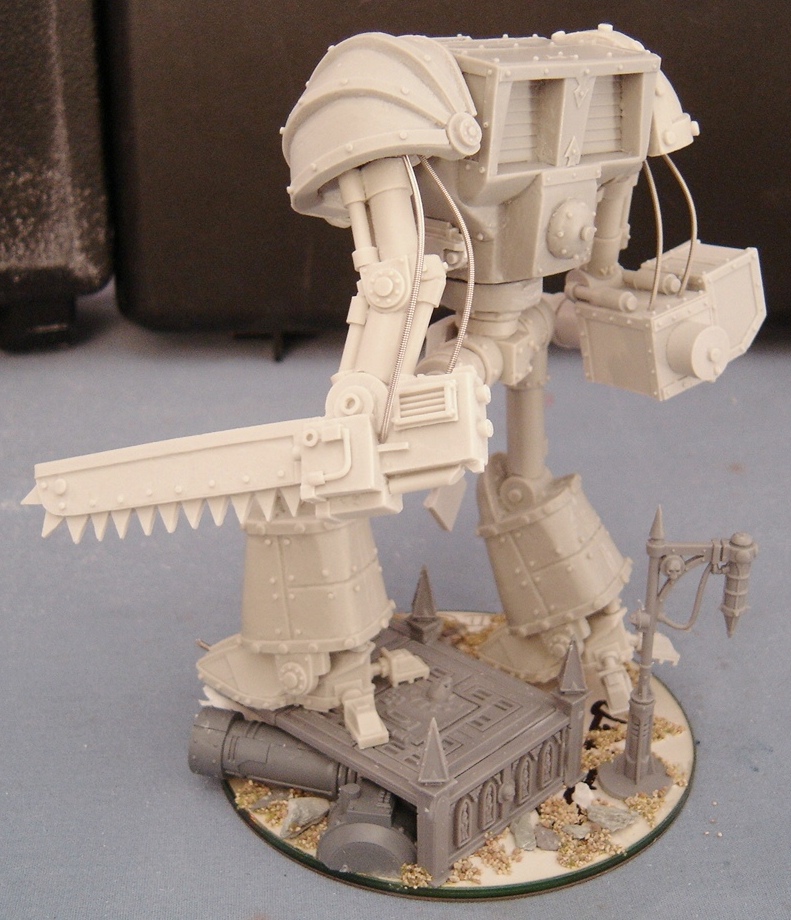
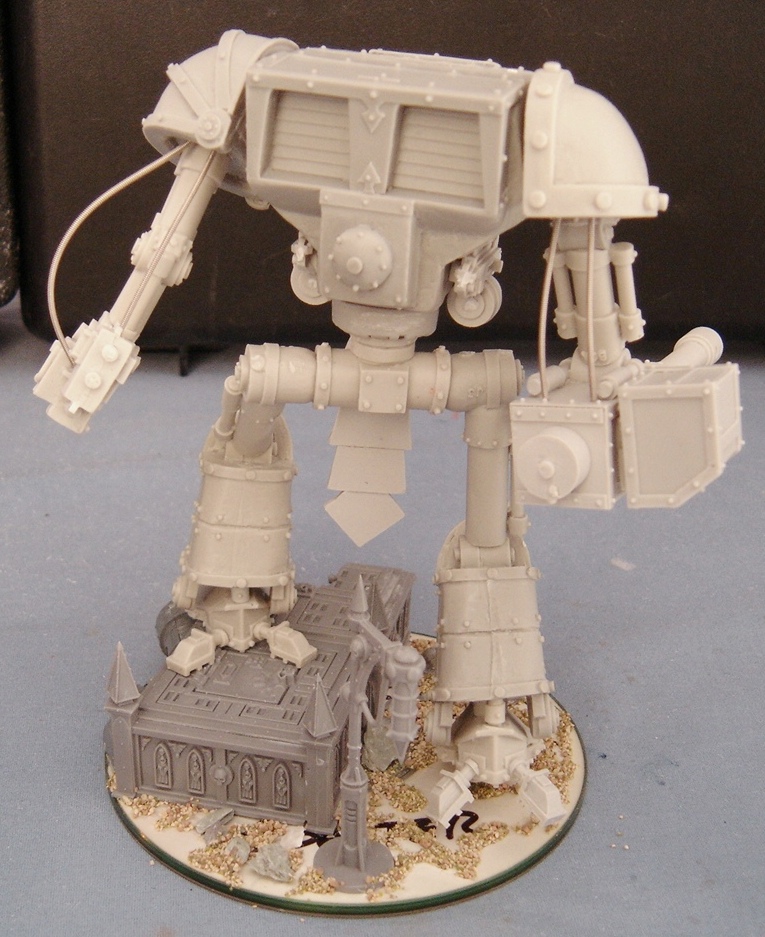
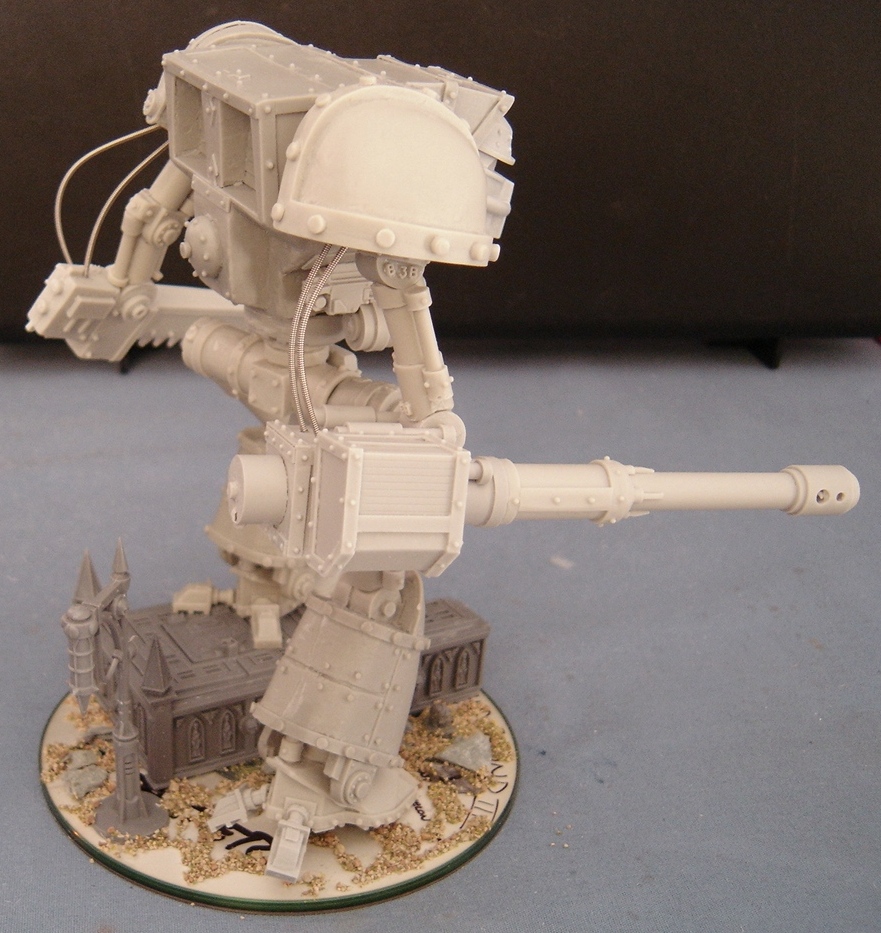
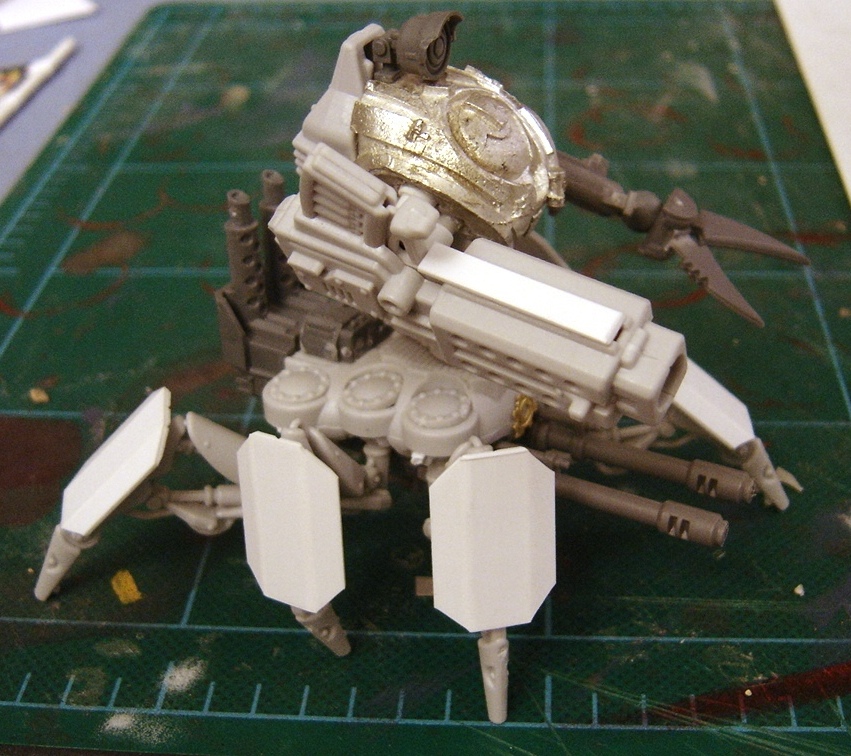
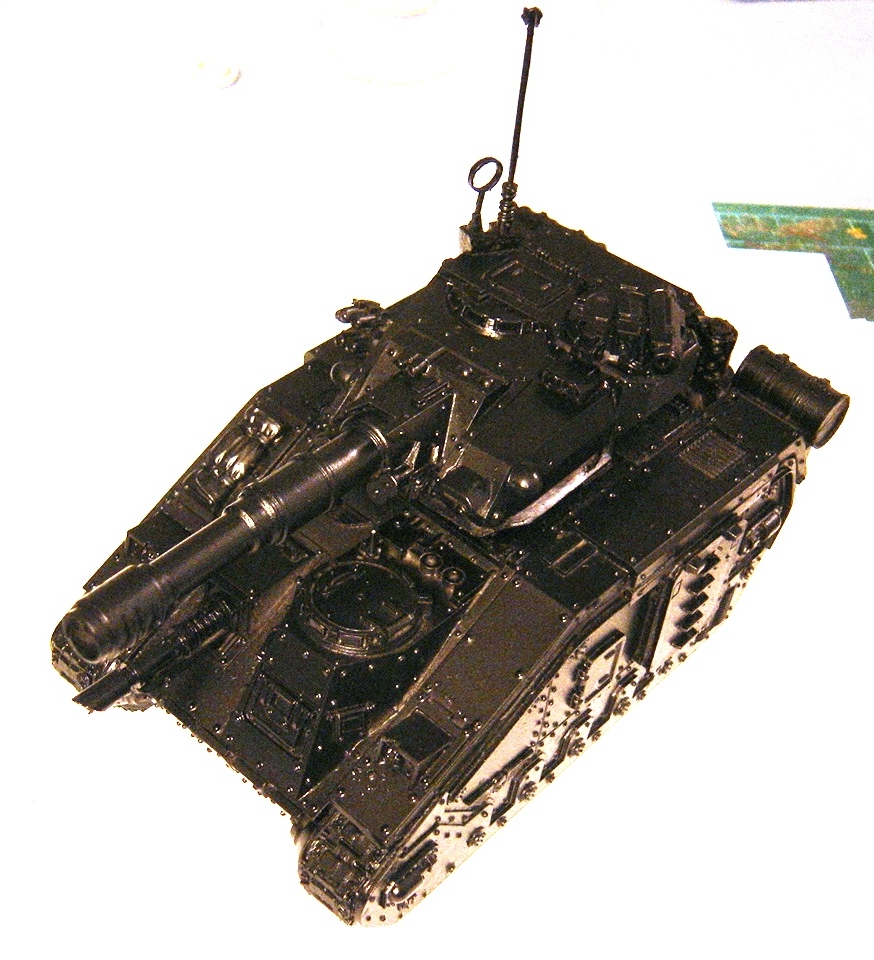
 On the back side I added some cabling and I'm planning on adding some purity seals here and there. Once it's primed and painted I'm going to add a kill banner to the Battlecannon. Not that it's going to be warm enough to primer anything anytime soon, so these will likely sit on a shelf for weeks until we get a day over 40F...


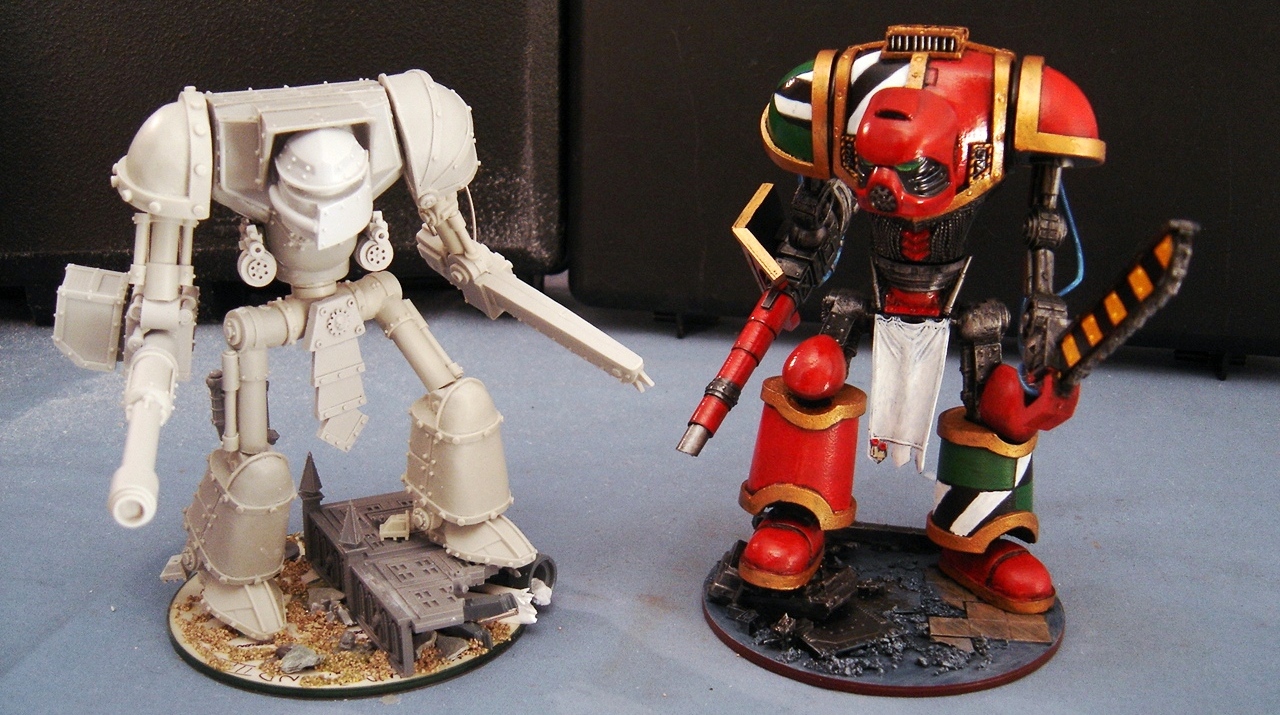
Lastly a side-by-side shot of the two Knights. They're very nearly identically sized, though the arms are just different enough as to look awkward if I try to mix and match between the two models. I do have an alternate set of arms for the painted Knight that I need to finish up (a Multi-Melta and Power Axe) that I need to finish that allows me to kit it out as a Knight Errant. Once I get those done I'll likely auction off the old knight along with the spare arms and just keep the new one, as I think it fits the look of the army a bit better.

...That and I'd likely get dice thrown at me if I tried to field two Knights in one game!

Saturday, December 26, 2009

TOEMP #9 - Heavy Metal, part 3

I hope everyone has been having an enjoyable holiday so far! The weeks leading up to the new year are always packed full so squeezing in some brush time is tough. On the up side, I have a few days off coming up and I hope to be able to finish off the King Russ tanks.


In the home stretch on the tanks, though - I started the detailing process, and laid down the Dark Flesh undercoat for the red sections.


I decided on blocking in the red side panels on one of the tanks to see how it looked, and I think I like how it's coming along. I'm going to go back and make the cogs along the upper track guard red, but other than I think I'll leave the rest of the detail in grey and pick out the winged skull in gold.


 I received a package in the mail on Wednesday, which contained a few models from eBay - more bits for the Adeptus Mechanicus army. I've seen some interesting conversions done with the Imex "Robogear" models, and poked around to see what was available. This 'Spider' model caught my eye, and I thought I might be able to use it to make a Myrmidon Assault Engine - described in the codex as being like a somewhat smaller version of the Defiler. Multi-legged chassis, a pair of dreadnought close combat weapons and a twin-linked autocannon, but lacking the Battle Cannon and having slightly weaker armor. I was really pleased with the contents of kit, for a 'snap-fit' model, it's rather well detailed and it appears it will work out nicely!


Thursday, December 17, 2009

TOEMP #9 - Heavy Metal, part 2

Well, I managed some forward motion on the King Russ tanks over the last few days, and got the main hulls and tracks painted. One of the nice things about painting tanks to me is that it really feels like you're getting a lot done. While it may take an hour to lay the base colors on, once it's done it certainly looks like I've accomplished a lot.


I start with a Shadow Grey basecoat followed by a drybrush of Fortress Grey, which is quick and easy, and I find it to be a good neutral color against which almost any other color I may choose to use stands out nicely.


On the tracks my standard scheme is a heavily drybrushed basecoat of Dark Flesh followed by a light drybrush of Snakebite Leather. I find that doing so ties the tanks in thematically with the infantry bases, which I rim in Dark Flesh. Once I get them all detailed out I'll go back and add a little road grime and mud-spatter along the bottom edges of the hull using the same earth tones.


Once I'm done with those stages, I go back over the tanks and re-black anything that's going to be painted in other colors, these shots are all taken after that step, but suffice it to say that following the drubrushing of the hulls, not only are the weapons, exhausts and what-have-you fairly spattered, but my hands (and occasionally forearms) are too. It's not the most tidy of painting methods!


 Painting up all of these at the smae time ensures that I'll be able to mix and match without there being egregious color variations between turret and hull. Although I use the same colors on all my tanks, when you set one that I painted six months ago next to one I painted three months ago, there's a noticable variation between them. One I may have drybrushed a bit heavier, or (and I've noticed this from time to time) one pot of Shadow Grey was a little bit darker or lighter than the next, and the tank is just not quite the same shade. It's not really a big deal, but it is noticable.

The 'heavy lifting' on the tanks is now complete, so all I have to do now is go over them and pick out all the detail work and add the heraldry. My intent is to use these interchangeably between the Mordian 7th and the Adeptus Mechanicus armies, so I'm considering painting in the side panels in red, but I'm not entirely sold on that idea just yet...

Monday, December 14, 2009

TOEMP #9 - Heavy Metal, part 1

The next Tale of Even More Painters challenge was issued a couple days back, and the option du jour for me this go-around is a minimum of two Heavy Support choices. My intention is to finish a trio of King Russ tanks that have been sitting around in a cleaned-but-not-assembled stage for the better part of 6 months, so I took advantage of the nice weather on Sunday to finish building the tanks and get them primered. Of course, these pictures of black primered models are somewhat grainy-looking since I had to crank up the mid-tones and contrast to even be able to see any of the details, but I figured I'd document the process from start to finish anyway!


First up is my favorite incarnation of the Leman Russ turret options, the Vanquisher. Several of my usual opponents are marine-playing cheese mongers, and facing off against multiple Land Raiders is a common occurrence. The Vanquisher is always handy in those situations for the massive armor penetration, and is the one tank that is guaranteed to instill a sense of dread in my opponents. This particular tank has no side sponsons, giving me a lower-cost hull option for lower-point value games.


Next up is the "Hold on, I don't have enough dice" variant - the King Russ Punisher, with hull mounted and sponson Heavy Bolters (from the Predator kit). It performs admirably against horde armies, but I find that even though the Punisher Cannon is AP-, it is still surprisingly effective vs. MEQ armies just due to the sheer number of saves the opponent is called upon to make. I built this one as an answer to a friend's Baal Predator, adding the Heavy Stubber on a pintle mount just for fun. 32 dice dropping on the table at once is always a fun sound...


Next is the most modular of the three hulls, currently shown armed with the "vanilla" Leman Russ turret. As a test the side sponsons on this tank were taken from the new Leman Russ Demolisher kit (which is also where the Punisher cannon came from). I really like the fact that the model designers gave us the option to do swappable weapon options, and the more I look at it, the more I like the look with the enclosed sponsons (though I don't dislike Predator-style sponsons either). Part of my intention for these three tanks is for them to be usable in the Mordian 7th and the Adeptus Mechanicus armies that I'm working on, so the experimental nature of the tanks load outs can be handwaved away as "Field Expediency Trials"...


Lastly, as I had a spare turret left over from an earlier project, I decided to utilize some of the leftover turret bits from the Demolisher kit and make an alternate Executioner turret for the King Russ variants. My intent is to use this one in concert with the insertable Plasma Cannon sponson options for maximum Plasma goodness.

I'm planning on painting all three of these tanks concurrently so that the paint tint and highlights match up exactly and the turrets and hulls can be swapped out interchangeably. Further updates to follow as I get some brush time logged!

Sunday, December 6, 2009

TOEMP #8 Complete - Forces of the Imperial Navy

I managed to finish off the second Heavy Support choice for the 8th Tale of Even More Painters challenge - An Imperial Navy Vulture. As soon as Forge World released the model with the twin Punisher Cannon upgrades, I knew I had to have one. Taking the lessons learned in assembling the first Valkyrie served to make this model go together rather smoothly.


I went with the khaki/bone/slate grey color scheme that I'd used for the previous Naval flyers, though I decided to pick out a slightly different set of panels for the bone color than I did with the Valkyrie to make them a bit more individualized. I still need to add the transfers to both of them, but as the weather is so cold at the moment I can't seal this model and as such the decals will have to wait.


I pulled out the other models to get a group shot and realized I still have yet to finish the base for the Thunderbolt fighter. There's still one more flyer in the queue - a Vendetta, to round out the various Naval options. Time to get cracking on that, I suppose!

Tuesday, December 1, 2009

Galaxy Building...

As I've alluded to in the past, over the last couple months I've been slowing getting my notes and ideas in order for a Rogue Trader campaign. I'd ran a Dark Heresy campaign last year, and while it was entertaining for me (and hopefully for the players), I wasn't super keen on the whole "GM-PC" inquisitor who mandated what the players did and where they went. It smacked a bit too much of obvious railroad-ism, though to be fair it was an easy way to keep the players on task, what with the whole "your other option is to be mind-scrubbed and/or killed" mentality. That being the case I think a Rogue Trader campaign has the potential to offer much more latitude to the players as far as their goals and challenges since the Rogue Trader is controlled by a player with his own motivations, unlike the GM-controlled Inquisitor in the DH system. Of course one of the important parts of any Rogue Trader game is a map of the expanse in which the players will be exploring (warning, stupidly huge picture):


Besides the charts and tables and miniatures and whatnot, I've also been slowly working on an interactive galaxy map of the Koronus Expanse (the locale detailed in the RT rulebook) utilizing the AstroSynthesis toolkit from NBOS. It's not the most user-friendly interface in the world, and there's definitely some things that it doesn't do that I wish it did, but it's the best tool I've been able to find so far. The nice thing about it (other than the full 3d animated, interactive map) is the Gazetteer that it generates based on the sector information - a handy guide for players on one hand, and a separate version that includes all the GMs notes and special info for me. I'm planning on kicking off the game in mid-january, so I still have a month or so to get it all finished up. Once it's done I'll make the sector files available to anyone who may want to make use of it.