Sunday, February 17, 2013

Dreamforge Leviathan Crusader Built!

Had some time yesterday evening to finish building the exceedingly excellent Dreamforge Games Leviathan Crusader - I have to say that I was completely blown away by this kit. The instructions were very good (with Mark from DFG doing a few updates, they're now spot on), and the pieces all went together like a dream!


There was some odd plastic vents and attachments to the sprues, but 90% of the time they were on nice flat, underside areas that were super easy to trim away clean. I spent a while getting the pose sorted out the way I wanted, then glued everything in place. The arms remain removable by design, and I left full articulation on the shoulder and elbows to allow for future weapon swaps.


I think it ended up with a decent sense of ponderous motion - my only nitpick with the kit at all is that the head has no option to rotate side to side - they must look straight ahead, which it a little limiting as far as really dynamic posing is concerned. The more static pose does give it a greater feeling of weight, I suppose...


The final side-by-side shot with my Knight Errant, and a presumably smug tech priest for scale. It's definitely too big to be a Knight in my opinion, I plan on arming it with a second Vulcan and running it using the Warhound.rules. It is roughly the volume of the old Armorcast Warhound after all!

Definitely an awesome kit, I enjoyed building it from start to finish. Now to primer and paint the monster!

Thursday, February 14, 2013

Dreamforge Leviathan Crusader Build Begins!

Miraculously I had a (relatively) work-free evening last night and after snapping some pics of the unboxing of the beast I couldn't help but get started with the build process. I don't plan on rushing through the build, and after I got started it became very apparent that this kit needs care and attention paid during the assembly process - that's not to say that the instructions aren't clear and concise, but there are a LOT of fiddly bits, and some of them need to be put in place in very specific order. Suffice it to say I did a lot of dry-fitting and re-fitting before I ever brought any glue to the party.


The lower legs are about a zillion pieces, with ball and socket articulation at the ankle, as well as pivots at the heel, knee and rotation at the hip (along with a further ball and socket). In addition there are a number of pistons that attach, stretch and articulate along with the multiple axes of rotation. I was astounded at how well it was designed. Unlike the FW leg pistons, these were designed to fit in any position the builder could imagine, with no cutting or trimming required.


One thing that I noted was that up to a certain point, the two leg structures are built identically. HOWEVER, at a certain point in the process the left and right legs become defined, and after that point you need to be very sure that you know which is which! I didn't add any of the leg armor plates as yet, as I wanted to be sure I was happy with the leg posing and positioning on the base, and be sure they would fit in the pose I have in mind. It looks like that won't be a problem, but on something of this size and complexity, it's definitely worth taking the time to be extra sure everything fits the way I intend.


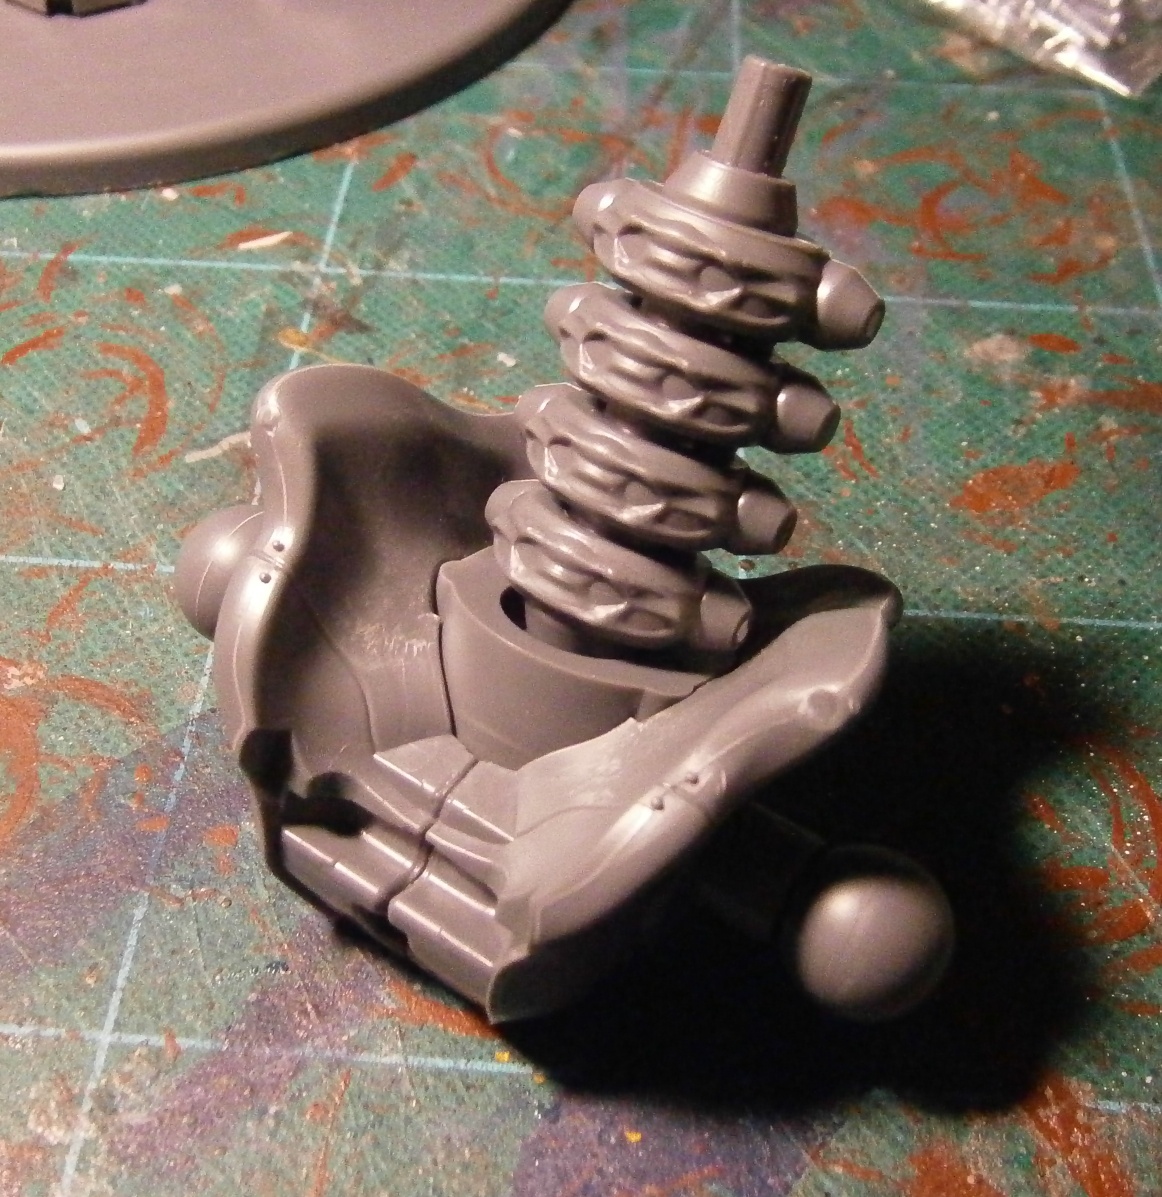
Before I could be sure the leg poses would work, I needed to get the pelvis and hips put together. More ball and socket articulation on the spine and hips means that it seems one can really get some dynamic poses out of the model!


At the moment it's just standing on the base, and not glued down, but I was rather pleased at how well it balances as-is! I'm still considering what I want to do to the base so nothing is permanently attached as yet. In fact, the legs are held in place primarily by screws and friction, so there's still plenty of opportunity to change up the stance before anything gets permanently glued in place.


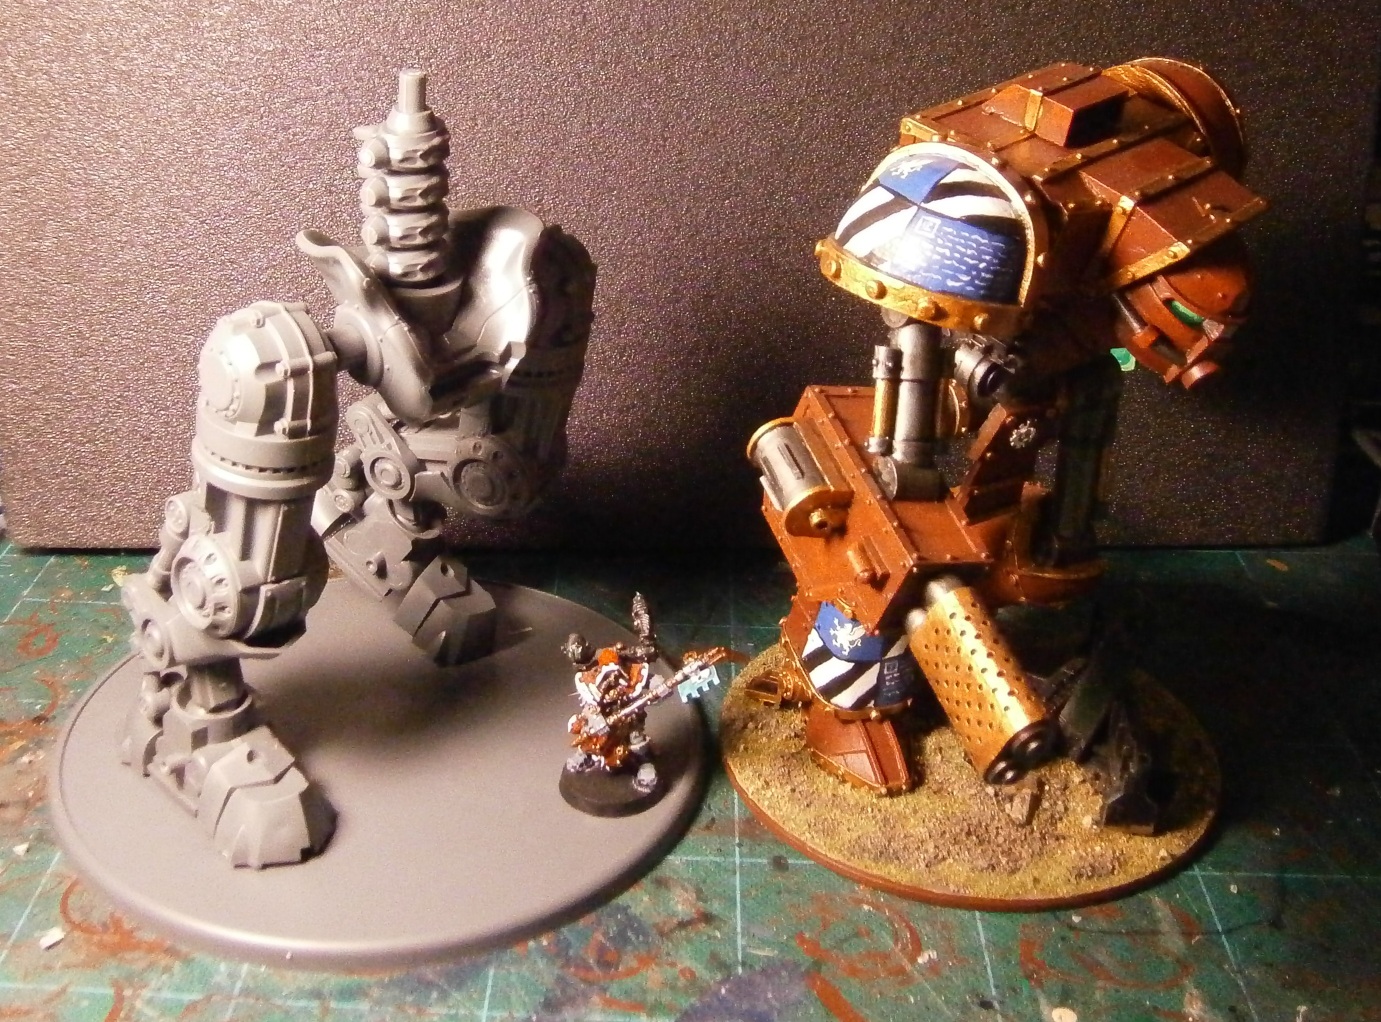
I realized that I hadn't included any models for scale in the shots thus far, so I grabbed a handy Tech Priest. He barely comes up to the ankle - it's gonna be big!


Speaking of - the initial intent was to use the model as a Warden Knight Titan, but it's becoming apparent that it's going to be significantly larger than the Knight Errant I've built.Not only is it going to be half again taller, but it's far more bulky. The armor plates that go on the legs will add a lot of apparent mass to the final model, that's for sure!

In game, I have a feeling it will be used as a proxy Warhound, though if memory serves Warhounds aren't allowed close combat weapons. No fear though, as the shipment that arrived also included a left-handed Vulcan cannon, for twin mega-dakka goodness! So far so good - I'm hoping to get some more build time in over the upcoming weekend (presuming I don't end up working. Again.)...

Wednesday, February 13, 2013

Dreamforge Kickstarter Leviathan Crusader Unboxing

Well... Real Life(tm) has been kicking my butt recently - it's been 60+ hours a week at work and that hasn't left much time for the hobby. However, I did get a huge package in the mail - the first batch of stuff from the Dreamforge Games kickstarter arrived, and I snapped a few pics of the unboxing!


I ended up ordering a pair of the Leviathan Crusaders, a Leviathan Mortis and a mess of weapon upgrades and whatnot. In the first shipment were the Crusaders, the left arm Vulcan cannons, the capacitor upgrades and the Excalibur alternate swords. Plenty to keep me busy until the Mortis and the other weapon arms show up a few months from now! I was impressed with the boxes, plenty of pretty pics and suggested build ideas!


Opening the big box revealed that it's all protected with foam, and I really appreciated the fact that they included a base for the monster as well - definitely a nice touch!


The instruction manual is thorough and appears to be pretty comprehensive, it definitely set my mind at ease for when it comes time to build the beast!


The sprues were all banded and stacked together and all the bits seemed free from warping (if only I could have said the same for the Sedition Wars models) and are all very crisp and well detailed. They use the same plastic sprue layout that the other Wargames Factory models utilize, but really seem better cast and more refined than the Shock Troop models I've been using for my Ad-Mech army. Definitely a step up in quality it seems!


At the bottom of the box was a plastic tray that includes a number of bits and pieces that I assume are what separates the Crusader from the Mortis kit, and to my surprise the kit also utilizes metal screws in the construction and includes a little screwdriver as well. According to the instructions, it's possible to build the kit such that it remains thoroughly articulated and posable, though my intention is to build it in a dynamic pose and glue it together for stability (which the instructions also suggests).

As I mentioned, I ended up ordering a pair of Crusaders and a Mortis, but I think one of the Crusaders will be going up on the auction block at some point soon. In retrospect I think I should have ordered up the 15mm versions for use as Knight Titans - this full-sized kit appears to be more in line with the Warhound Titan scale-wise. Not that there's anything wrong with that!

Really looking forward to getting stuck in building this kit, though it's unfortunately not looking like I'm going to have a lot of free time to do so in the near future. Boo!

Sunday, February 3, 2013

Dark Angels - Assault Squad painted

Assault Marines are a mainstay of many of the armies I face, and they messily butcher my Guard at every opportunity so it's a given that I'd add some to the Dark Angels. I didn't want to just bang out a basic squad though, I had plans to do a 'vanguard veterans' equivalent utilizing the Sanguinary Guard winged jump packs. Seemed to me that the wing motif carries through both the DA and the BA, so there's definitely opportunity to pilfer decorative bits from their crimson bretheren.

...And then I got the codex, and found that veteran squads can't take jump packs. Ah well, regular old assault marines they'll be - no sense in letting the modeling idea go to waste however!


Once it became clear that they'd just be a vanilla assault marine squad, they were giving the most basic of wargear to keep the points down (unlike the triple plasma-toting tac squad). Bolt pistols and chainswords all around, with the veteran sergeant carrying a power sword.


The initial test model I'd built prior to reading the codex became the sergeant model, which worked out well. I'm glad I waited before building the whole unit, that's for sure!


Tried to do a little engine glow in the back, though I'm considering trying to add a little OSL to the wings near the upper thrusters. All in all a fun unit to build and paint, and they add a little extra eye candy to the army overall!

Friday, February 1, 2013

Dark Angels - Vindicator "Gloriam Leo" painted

Got a chance to snap a few pics of the last few painted units for the Adepticon army I've been working on recently. First of the batch is the Vindicator, "Gloriam Leo":


Not a whole lot to say about the tank, I magnetized the dozer blade for ease of painting/transport/points cost and added a fair number of decorative bits taken from the Ravenwing upgrade sprues to Dark Angel it up a bit.


Can't go wrong with a big ol' chapter symbol on the front, and a mess of banners, scrolls and whatnot on the rear!


The whole thing painted up rather quickly. Started off with a black primer followed by a basecoat of Dark Angels green, then progressively lighter drybrushes of Snot Green and Goblin Green. Once that was all done the whole thing got a thinned wash of Thrakka Green. Then it was just a matter of picking out all the smaller details. Next up on the photo stand are the assault marines. I wasn't too happy with the shots I took now that I'm trying to color balance and crop them, so I'll need to have another go at taking pics...