Sunday, February 28, 2010

The last of the Crimson Fists - Part 1

Over the past year my model-buying has seriously outweighed my model-completing - Far too many projects crowd my shelves and lurk within the depths of the Closet of Doom. It's high time to rectify that situation and polish off some of the smaller side projects and get them out the door. That being the case, I've decided that the next major painting effort will revolve around cranking out the Crimson Fists army I have been procrastinating on.

 
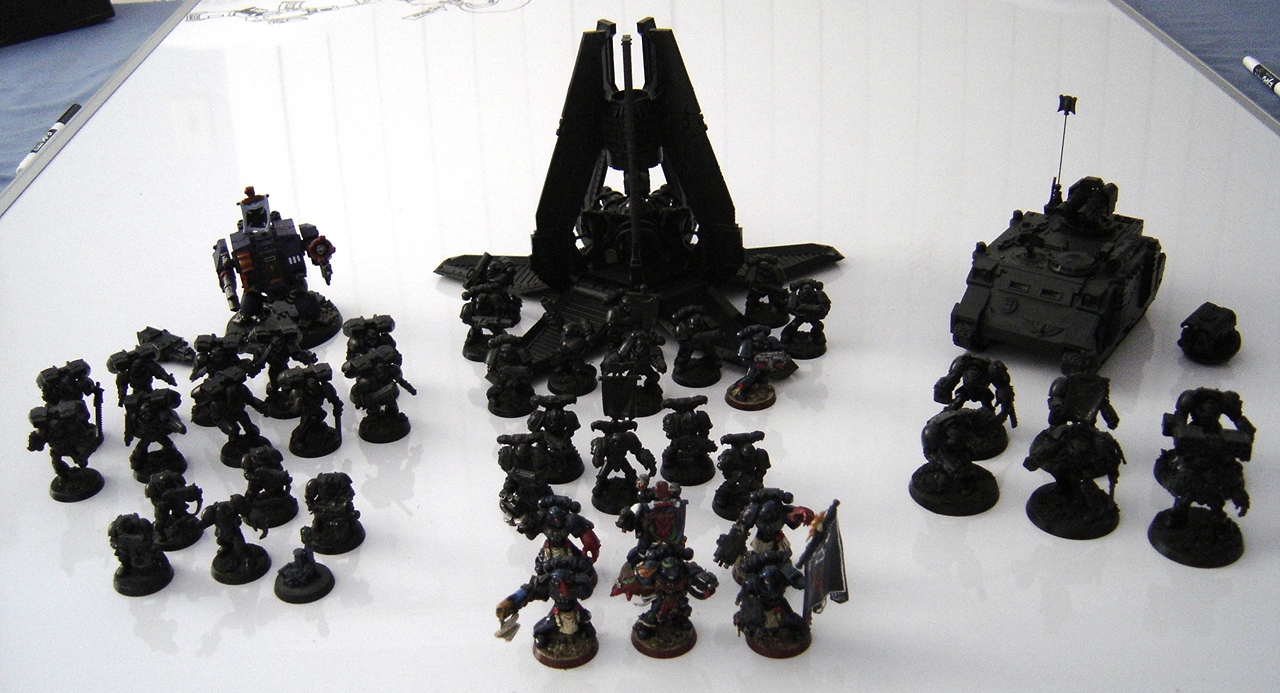
I'd assembled this small force with the intent of using it as an allied assault force for the Mordian 7th, but in all the time that they've sat assembled, they have only taken the field once. I'm thinking that I need to add a Devastator squad to round out the army, though if I do so I will be assembling them from existing bits. With the exception of the upcoming Battle Missions book, I have vowed not to buy any more models until I complete and sell the Crimson Fists. I plan to attack them assembly-line style and paint all of the remaining infantry at the same time. I spent a bit of time this afternoon applying the initial Midnight Blue basecoat to the models, and plan to add at least one color to them every other night until they are complete. ...At least that's the goal!

 
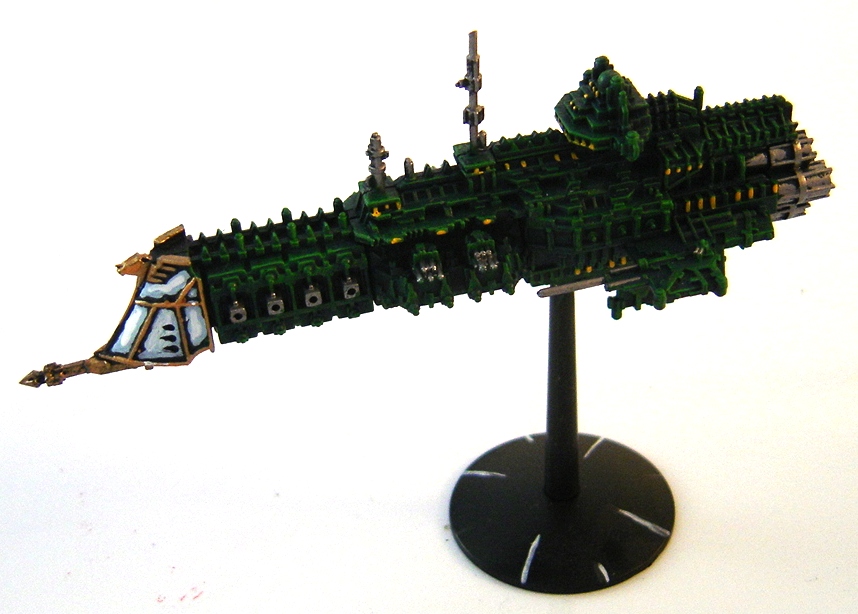
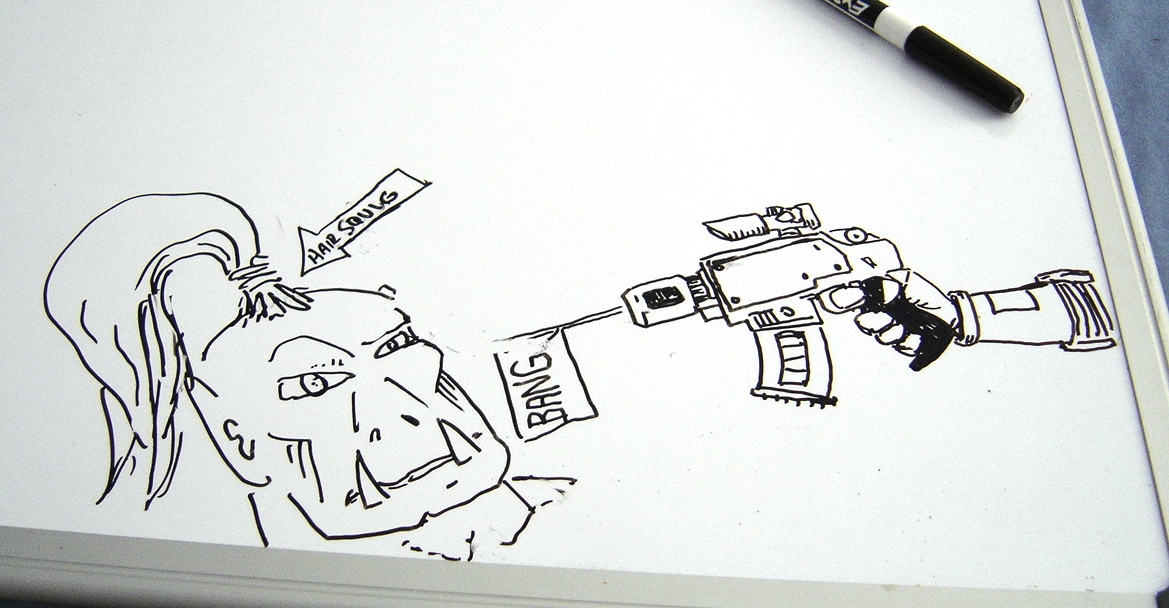
 In other news, I've been running a bi-weekly game of Rogue Trader for my gaming group (the above cruiser being one of the recently-painted models we're using in the game), and I'd purchased a 3'x4' dry-erase board to facilitate gameplay - it's great for sketching out a quick map or keeping track of notes and such for the various players (not to mention being a decent backdrop for white-balancing model pictures). Of course, it does lead to random doodling on the part of the players as well:


That's it for February, here's hoping March is a productive month!

Saturday, February 20, 2010

Knight Paladin 'Vultus Mors' - Part 3

Work continues apace on the Knight Paladin - I found some time to add some of the detail scrollwork as well as add some waterslide transfers.

 
I took the advice of several people and rooted around in the old Empire transfers that a friend gave me to find a rampant lion, and decided to add a smaller stylized "T" of the titan legions just to show the Knight household's connection with their larger cousins.


I started working on the base as well, it's nearing completion though there's still a bit more weathering and highlighting that I plan to do. I've been experimenting with adding modeling snow to some bases based on the excellent tutorial by Misterjustin on From The Warp, and I'm considering adding some to the various bases on the Ad-Mech army. I think that some white snow on the rubble bases could set off the reds and golds of the models nicely...


The next package from the fellow that sculpted the Knight Paladin arrived yesterday, which included a pair of Knight Pilot models, the original sculpts can be seen here at Big Daddy's Blog. Of course, it's back to blowing snow and sub freezing weather here, so they're not getting primered any time soon, more's the pity. I really need to track down some Gesso and give that a try for these cold winter months...

One more painting session and I think I'll be finished with Vultus Mors. No major changes from here though, minor cosmetic detailing and weathering is all that remains!

Wednesday, February 17, 2010

Knight Paladin 'Vultus Mors' - Part 2

I had time to get a bit more work done on Vultus Mors yesterday, and it was nice enough to grab some pictures this afternoon:


I was able to get all the Burnished Gold trim blocked in, though it still needs the Shining Gold highlights. I also added a banner to the Battlecannon arm and roughed in the hazard stripes on the Chainsword.

 
I experimented with Devlan Mud for the first time on the Boltgun Metal and I really liked how it turned out. The banner was printed out on thin cardstock and glued to a small plasticard tube before being pinned to the barrel.


It's time to start working on all the smaller details - scrollwork, iconography and such. Once that's done there will need to be another highlighting stage, and then I can attack the base. I'm pretty happy with how it's coming along so far, though I'm still undecided what I'm going to do for icons on the green parts of the heraldry. I'm torn between the stylized "T" of the titan legions and something with a bit of 'old world' feel to hearken back to the knightly orders fluff. I'm open to suggestions!

Monday, February 15, 2010

Knight Paladin 'Vultus Mors' - Part 1

The fellow that made the newer of the two Knight Titans I'd purchased is organizing a painting contest over on the Adeptus Mechanicus forums, and I figured that was an excellent reason to get cracking on the one I'd picked up. I spent some time yesterday laying down the base colors, and snapped a few in-process shots:


I decided to mimic the scheme that I'd used on the first one though I'm going to add some sort of heraldry to the green sections on the shoulder and shin, and will be doing a bit more scrollwork and such. Obviously I'm just focusing on painting the knight itself so far, but the base should be pretty fun as well, I tried to add a lot of fun little details that you really can't see in the primered state.


I still need to add all of the burnished gold trim and add hazard striping to the chainsword. I'm going to go in and add a bit of brass/gold to the various pistons on the arms and legs as well. The all-steel look strikes me as a bit bland now that I'm looking at the pics.


There's still a bit more to be done highlighting the red panels as well - they still look a little flat. I struggle with red over large surfaces, so this has been a bit of a challenging model for me. On the other hand, I think this model has a lot more character than the first one I'd painted, and overall it's been a lot of fun to work on!

Tuesday, February 9, 2010

Better call the exterminator, I think I have Termites - Part 3

As I was organizing the Closet of Doom, my eye fell upon the stack of old-style Chimeras that I'd purchased in preparation for the hose-job GW would be handing down in the form of the new release. The recent batch of rumors about the incoming Chimera and Basilisk kits seems for confirm my fears - Non-standard turret rings, over-simplified track sections, and no upgrade sprue? No thank you. Don't get me wrong, the new kit goes together like a dream in comparison to the old one - the new Hellhound was a joy to put together. However I really feel that the conversion options available with the new kit are significantly reduced when compared to all the fiddly bits the old kit gave us.

I've been kicking around the idea of building a Termite carrier, though what purpose it would serve eluded me. Never one to let practicality stand in the way however, I'm going to press onwards, and at the very least I'll end up with an interesting piece of terrain!


I dug out some old catalog pictures to reacquaint myself with the old model (as sadly all my old Epic models have been sold ages ago). The original model should be reasonably easy to recreate using a couple Chimera kits and some plasticard - I'm thinking that I'll use two sets of sides to make a somewhat elongated track section, and just use plasticard for the superstructure.

I've had some initial discussions with the fellow that runs Ramshackle games to see if I can get just the drill section in order to create my own completely-out-of-the-ground Termite, though I'll admit for $15 I'm just as happy ordering another complete Boring Machine and sawing the drill free. While I'm confident I can make the crew section a reasonable facsimile of the 'emerging' model, I think the drill head itself needs to match exactly for continuity's sake.

It appears that the North American Weather Control Satellite will continue to be set on 'Hoth" for the forseeable future, so I may as well spend the time indoors doing some modeling!

Sunday, February 7, 2010

Better call the exterminator, I think I have Termites - Part 2

I managed to find some time to finish off the Termites over the weekend (though it's too cold outside to seal them at the moment). They painted up rather quickly, and I decided that rather than make them all exactly the same I'd try to give them each their own bit of individuality.


It appears I still need to back and erase the pencil lines that I used as guides around the rim of the drill (they show up in the pictures much more than they do in person for some reason).

I painted one up in the ubiquitous hazard striping, another with the cog-wheel motif common to many Adeptus Mechanicus vehicles, and then butchered some latin to make a proto-gothic script around the third. It says "Ex Carceri Viscus, Omnissiah Vindico Nos", which loosely translates to "From the prison of flesh, Omnissiah deliver us". I am really pleased with how they turned out, and I would heartily recommend Ramshackle Games for their affordable and professional casts!