

Primer Colors - As I'd stated before 99% of the time I start off with a black primer, as I tend to paint 'dark to light'. This means that generally the models will be of a darker hue overall, and it's worth noting that certain colors don't work well when painted directly onto a black undercoat (more on that below). A white primer allows for a much more brilliant and vivid end result, but much more care must be taken to ensure that all of the underlying white areas are properly covered. The effort involved for that outweighs the end result in my opinion.

I have dabbled in alternate primer colors as well, using a brown primer to undercoat the WW2-themed Orks from a while back, and have tried a metallic silver on an abortive Necron force that never really got off the ground.
.jpg)
Base/Shade/Highlight - "Three color minimum" is a phrase often used in events requiring painted models. While surely just slapping on three colors chosen from the Triad or Split Complimentary would meet the bare requirements, without some shading and highlighting of those colors the models will tend to look flat and lifeless. So I like to think of any color being applied as having its own three color minimum - What this means is any color that I apply will have a darker tint in shaded/recessed areas, a mid-tone (or two) and finally a highlight on the areas most exposed to light. As mentioned in an earlier post, I tend to paint dark-to-light so rather than starting with a mid tone and shading down and highlighting up, I'll start by blocking in the areas in the shade color first, then build up in brightness from there. For example, the green on the Rogue Trader's pants consist of Jade Green (shade), Foul Green (mid-tone) and Livery Green (highlight). Any other colors will also consist of at least three tones, so even a model painted to a "three color minimum" would in fact include at least 9 distinct paint colors if not more!
.jpg)
.jpg)
.jpg)
.JPG)
Color blocking - It's worth considering what areas will be getting what colors in what order, and I utilize the "Inside Out" method, which means that in general I'll start with things like skin or underclothes, then work my way outwards through the layers of clothing and armor, and ending with any pouches/bags/equipment that may be attached on the outermost layers. This allows me to be pretty sloppy with my application early on, as subsequent layers will clover up any overspill. For example, when painting the Ork's skin in the picture above, I'm not too worried if the color slops up over onto the armor, as those areas will be painted over and cleaned up in a subsequent stage.
Application methods - Coupled with the multiple color tints, the various steps are generally done using two main styles of painting, what I consider basecoating and drybrushing.

Basecoating - When I'm applying the first dark shade of a color, I'll use the brush to fully block in the entire area leaving none (or verrrry little) of the black primer color showing. It is important to avoid obscuring detail with thick application of the basecoat, the use of the wet palette will help, but Ill generally ensure that the brush has a little water in it when picking up the paint from the palette as well. I don't go down to the full 'milky consistency and 5-6 applications' level, for my purposes the basecoat will usually go on in 1-3 coats depending on the opacity of the paint in question.
.jpg)
Darker colored/more opaque basecoats such as the Jade Green used on the Rogue Trader's pants will usually cover in a single pass, while lighter/more translucent colors such as oranges and reds may take a few layers to get rid of any streaky appearance of the underlying black primer (more discussion below on opacity).
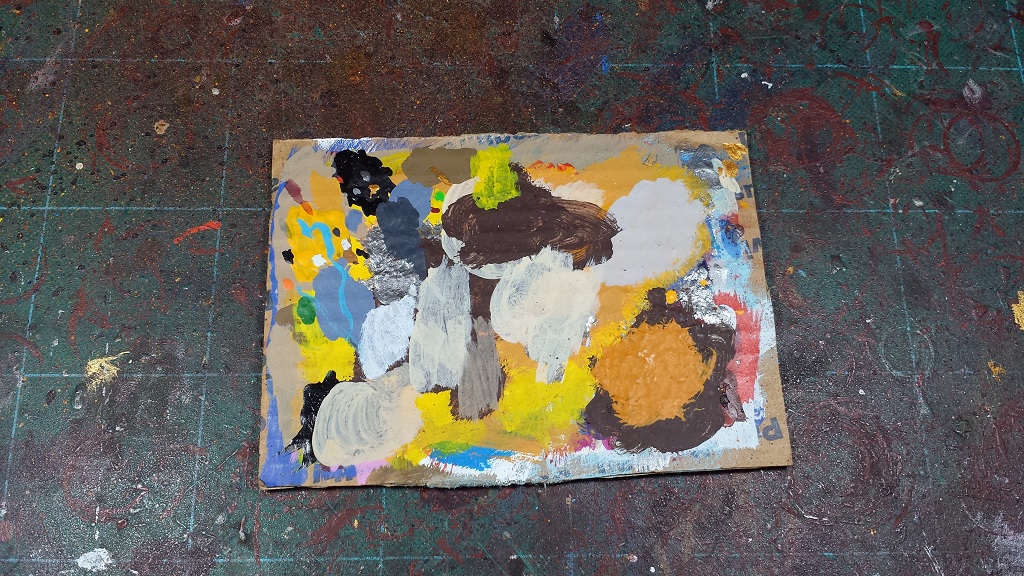
Drybrushing - In opposition to the 'thin your paints' advice above, when it comes to drybrushing you want very little to no water involved. This is my primary means of painting, and is where cheap/old brushes shine. Load up your brush with the color, then use a paper towel or piece of paper/cardboard to wipe off most of it. You can see my 'dry palette' above, where I scrub off the majority of the paint on the brush. Once a swipe is only leaving a little bit of paint behind it's time to apply it to the miniature - unlike the basecoating step above where we try to ensure everything is colored in, just draw the brush lightly over the surface of the model, and the little bit of paint let on the brush will adhere to any upraised surfaces, leaving the recesses untouched.
.jpg)
The more pressure applied, the more paint will be left on the model/deeper into the recesses. I took advantage of this with a heavy drybrush pass in the mid-tone Foul Green color, leaving just a little of the Jade Green base coat in the recesses...
.jpg)
...and then a lighter drybrush pass with the highlight Livery Green color, leaving some of the mid-tone color showing, as well as the shade color. While natural light on a miniature will provide actual shadows, the various green shades force the perspective thereby making the textures of the pants much more obvious from a distance thereby giving the miniature a sense of scale.
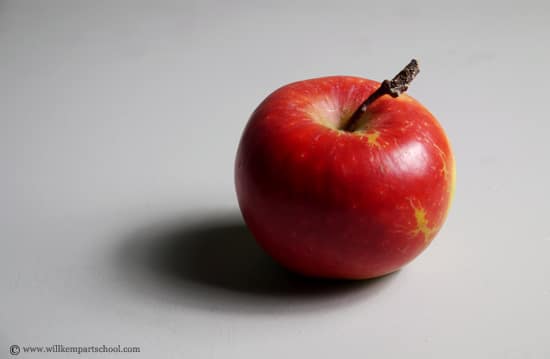
One other thing to bear in mind when drybrushing/highlighting in order to help the textures really stand out is where the light is hitting the model. While it's certainly feasible to just brybrush all over the model thereby picking out all the raised areas with the highlight colors, it's slightly more realistic to concentrate the drybrushing primarily on areas that would be hit by the light source. I generally assume the light is coming from overhead, so I'll concentrate on the uppermost surfaces of the models, leaving the shade colors more pronounced on the undersides. The picture of the apple above is a decent example - Technically in reality the whole apple is roughly the same color of red, but the upper surfaces reflect more light and as such look brighter than the underside that sits in shadow. It is by exaggerating these color variations that a miniature can appear to be lifelike in a tiny scale, as opposed to just a small sculpture.
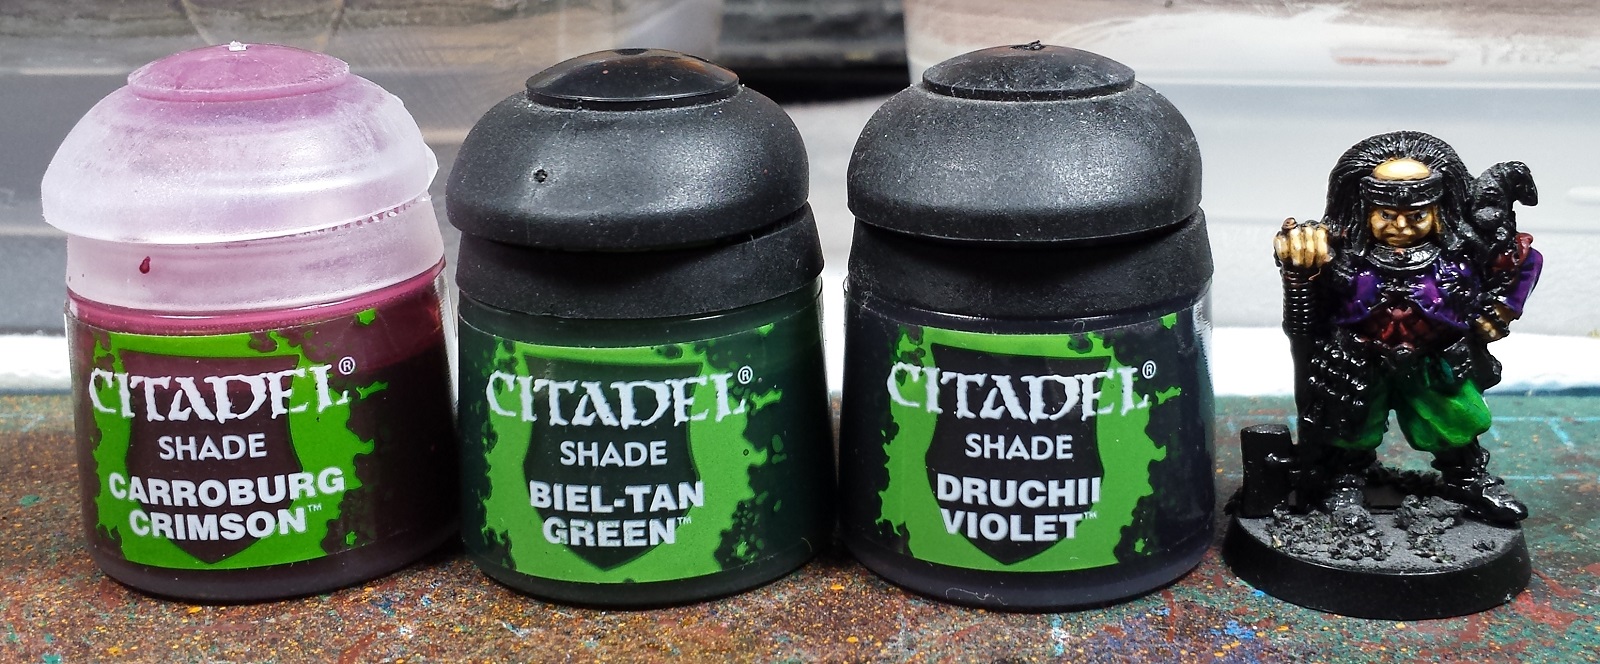
Washes -Washes provide a fantastically easy way to provide shading and subtle color gradients to a miniature. The nature of the medium is such that it will tint the base color as well as flow into any recesses providing a deeper shade in those areas - essentially the opposite of drybrushing's effect. I'll almost always include a wash stage in every color. For example the reds, greens and purples all got matching washes. The washes help soften any graininess that a drybrushing step might cause, and help to blend the color gradients together.
.jpg)
While it's simple enough to just wash a color with its matching shade, some interesting effects can be achieved by washing colors with complementary shades as well. For example the Alpha Legion scouts above started off with a green undercoat, and then multiple successive passes of blue wash were applied. Similarly the yellow of the recent Imperial Fists includes a Sepia wash, and my go-to gold recipe utilizes a fleshtone wash. Definitely worth experimenting with the possible color combinations!
.jpg)
A wash means it's break time! Usually using a wash signifies the final step in a given painting session for me. Unlike acrylics which will dry in moments, a wash really needs a good long time to dry. If you end up getting any fresh paint onto an area where a wash is still wet, it will have a tendency to wick the paint or alter the color. Definitely let a washed model sit for a good half hour or more!
.JPG)
Painting in Black and White - Unlike the colors we've been discussing above, black and white have some interesting properties to bear in mind when working with them. With colors, there's the idea of a shade/midtone/highlight, but black and white each sit on an end of the spectrum - You can't paint something darker than black (barring crazy science), and you can't highlight something that's white. In the case of black, I'll generally really push the edge highlights, or add a fair bit of weathering to contrast against it. It's a color that I struggle with the most, personally! On the other side of the coin, one of the best pieces of advice I ever received was 'never paint with pure white'. What this means is against other colors, even a light grey will end up looking white. I'll generally start with a light blue or shadow grey basecoat, followed by a stonewall or cold grey midtone, and highlight with ghost grey. A pure skull white color may be used as a verrry thin extreme edge highlight if desired, but that's about the extent of its use (other than as a tinting agent when mixing ones own colors).
.jpg)
Opacity considerations, or why certain colors are 'harder' to paint than others - Certain paint colors by different manufacturers tend to be more opaque than others, generally the ones toward the green to blue end of the spectrum are more opaque, while the ones toward the orange and yellow end tend to be more translucent. This means that the undercoat colors matter far more when using them - a translucent yellow painted over a black basecoat will tend to look splotchy and lifeless, but will be very bright and shiny over a white basecoat. As I almost always start with a black primer, this means that part of the process for painting translucent colors is to start off with a basecoat shade that has enough opacity to cover the black, and provides a complimentary color for the final color - for example my red recipe always starts with a Dark Flesh basecoat, as the reddish-brown tone covers the black well, but also provides a warmer color for subsequent reds to build on. A bit of this can be seen on the bases of the Thousand Sons above - The black of the base shows through the red, making it look dull, while the red of the armor (with the dark flesh undercoat) is much warmer in tone.
.jpg)
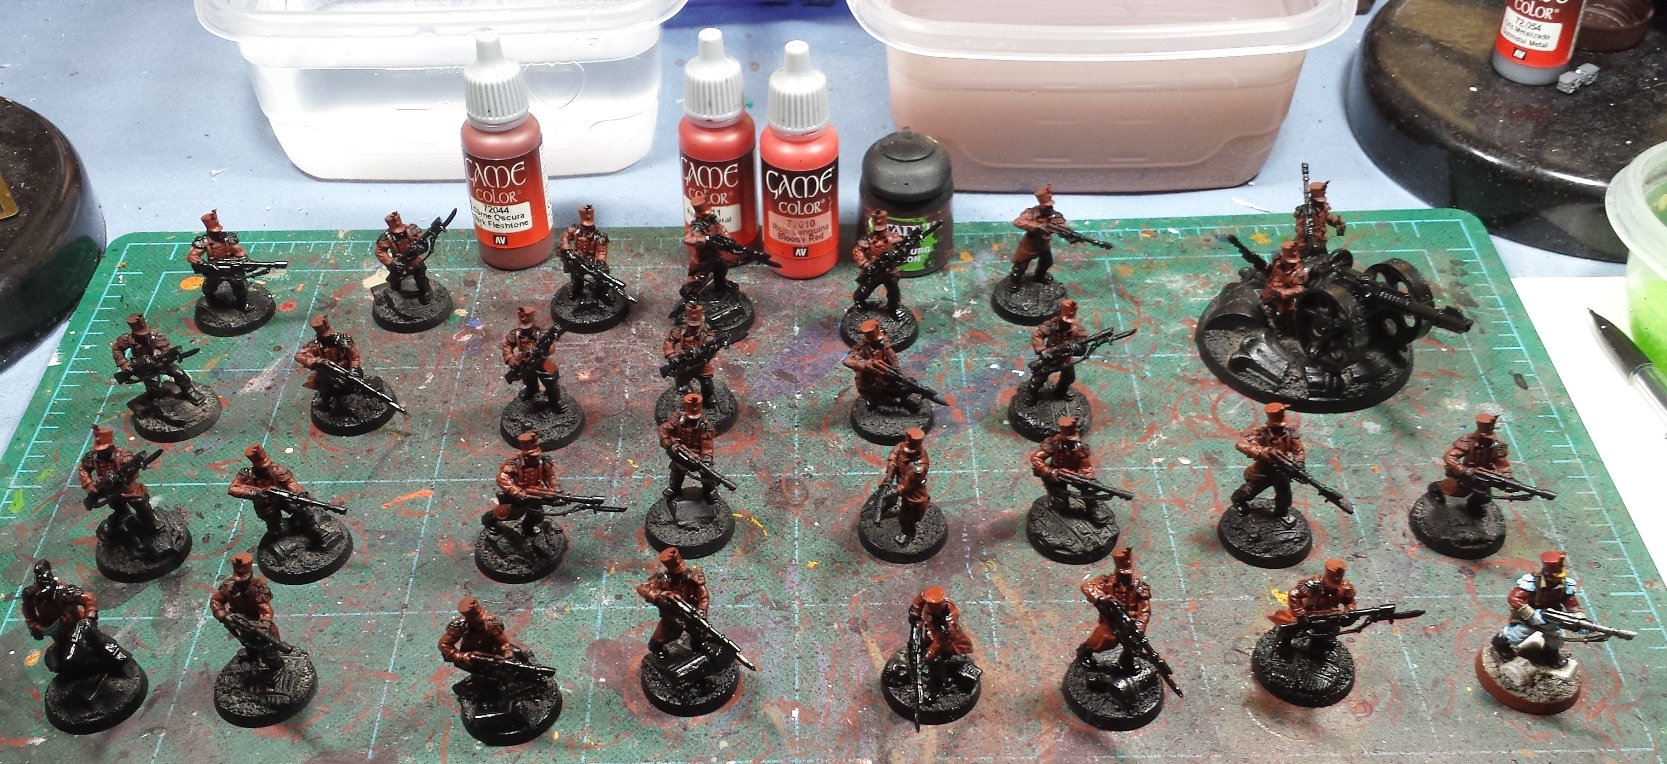
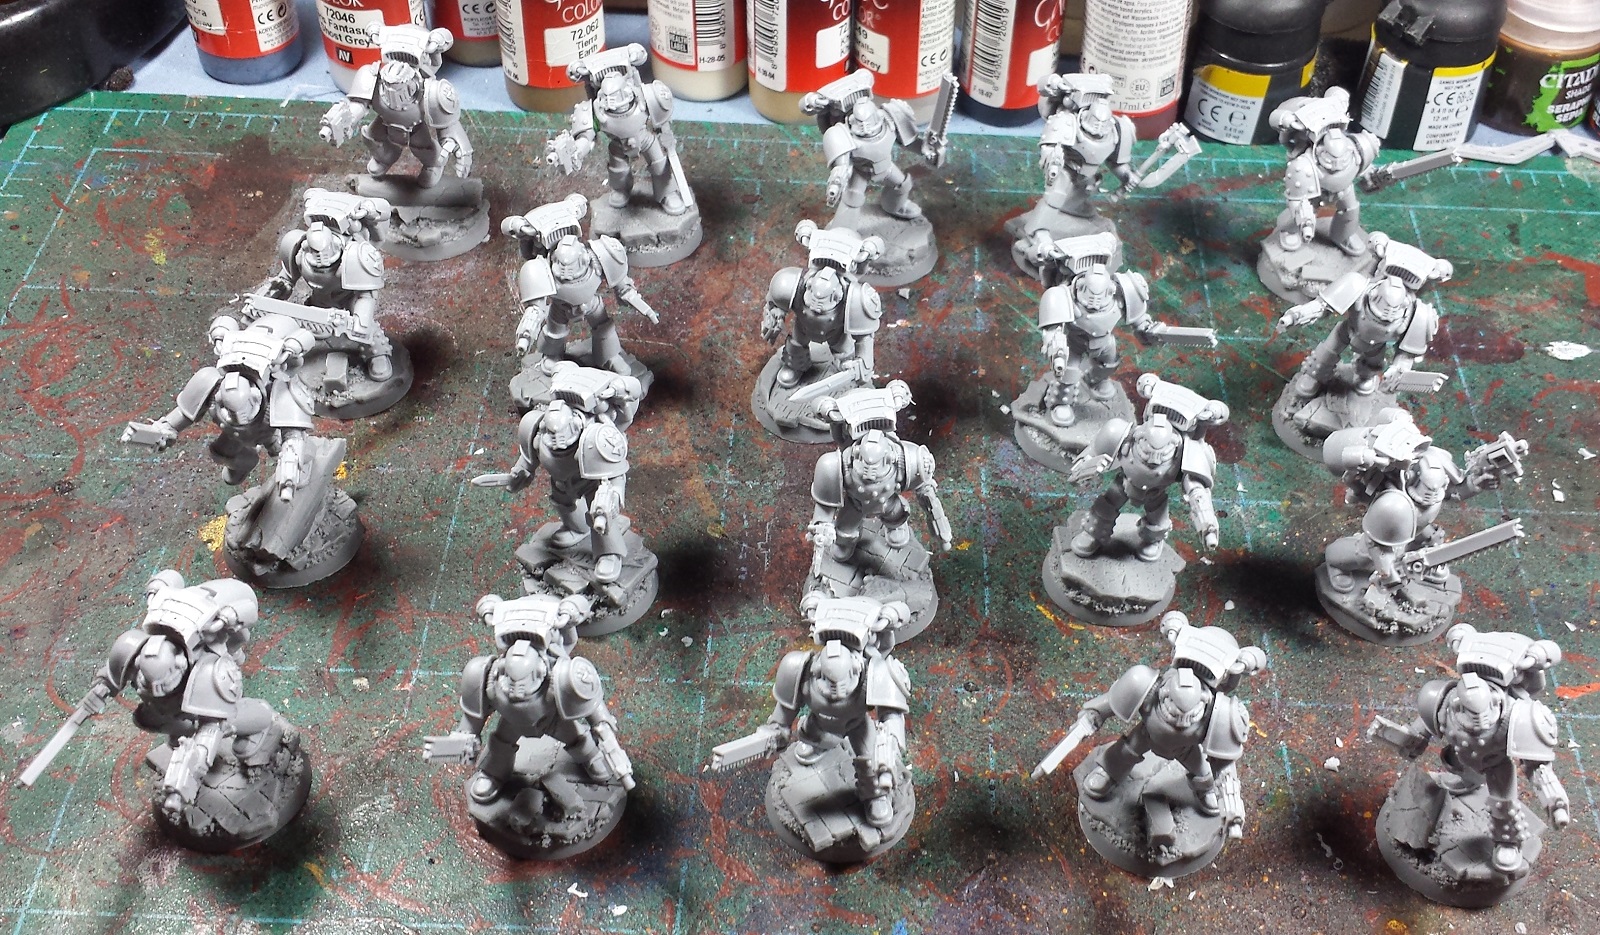
Batch Painting - As many of you are aware, I'm a big proponent of the batch painting idea whereby I'll work on 20+ models at a time. What this means is I'll get a whole mess of models that all get the same paint job, and just work through each color assembly-line style - every one gets the basecoat color, then each one will get the mid-tone, then the highlight, and so on through the scheme until at the end all of them are complete. This helps keep consistency between models, and it's a nice feeling to suddenly have a huge pile of completed models. I'll generally set a goal of getting one to three colors done in a given session, then take a break and come back later on/the next day for another one to three colors and so on. After four or five sessions suddenly everything's done all at once! This sort of thing can be a little on the tedious side, so I'll generally have some form of entertainment going such as some music, a movie on in the background or far more common, an audiobook. I've been cranking through the Horus Heresy novels while painting all the Heresy miniatures, it's a great source of inspiration, and helps keep my mind off the whole "18 more to go... 17 more to go... 16 more to go..." issue. Hah!
Next up will be some discussion of painting fine details such as faces and decorations, as well as putting the finishing touches on the models!


.JPG)


I loathe assembly line painting. I am doing a 10 man tac squad and a 6 exnos scorpion squad for the NOCF this year and I am hammering away at it non stop and it is killing me. I have so much respect for your army painting abilities. I'm totally gonna miss my deadline but only by a week and the minis will look boss so I doubt anyone will break my knees (much)...Who the hell can paint 15 minis in two months?! Madness!!!
ReplyDeleteExcellent articles!
ReplyDeleteSome tips I'd like to share to the wash stages!
1) You can thin washes to adjust how they work
2) You can use washes to dye (quickly apply on a very light color, time it, then lift off with a brush or towel. It'll stain the color depending on the time you left the wash on, and stain different areas in varied intensities).
In this way you can use a very bright wash to tint and add variety to colors, without being overpowering. (especially potent with strong washes, such as secret weapons)
3) Going with #2, you can use an absorbent material, such as a towel, to lift surface washes off, and allow them to only stay in the recesses.
4) Applying a gloss varnish prior to the washing stage can make the washes flow like absolute magic into those recesses, but this will make it difficult to get surface tints.
Each colour as a three colour triad ? Makes sense.
ReplyDeleteGreat article and very helpful for a hobby philistine like myself!
ReplyDelete