

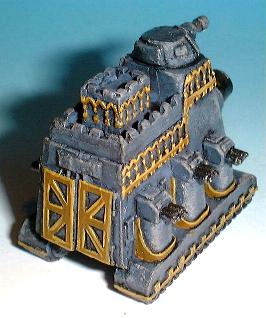
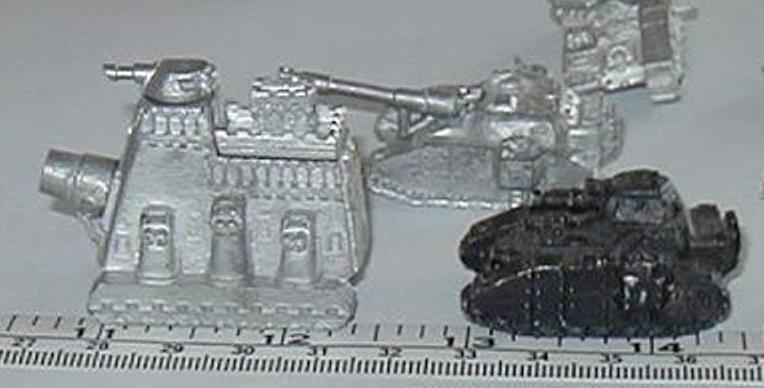
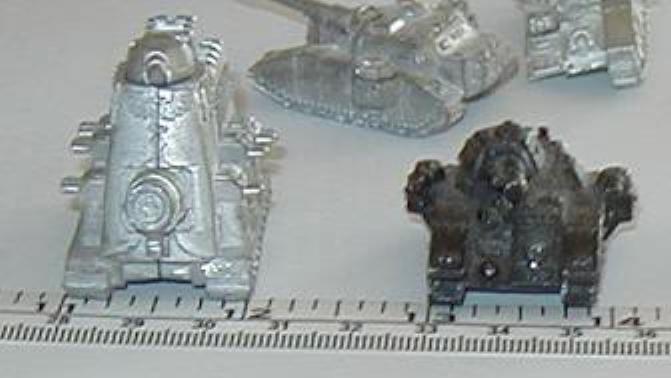
There have been some absolutely stunning, incredibly detailed versions of 40k scale leviathans over the years, and most have done work that is far beyond my talents - however, that's no reason to not give it a try! I have made the decision that I'm going to try and stay as true to the old Epic model as possible - More of a "what would an Armorcast Leviathan look like" rather than "what would Forge World do?" style. Based on the pictures below, I settled on a footprint of roughly 14"x9" - slightly larger than a Baneblade, which I thought would make it a reasonable size for tabletop gaming.
I started off with some half-scale sketches in the ever-useful quad-ruled composition book then measured and cut a set of panels from cardstock to test the fit of the main superstructure, which worked better than I would have expected. After that proof of concept I swung by the hardware store and picked up a mess of plastic signs (as it's cheaper than Evergreen/Plastruct in sheets), figuring if the main parts fit, I could press forward with the next phase...
.JPG)
.JPG)
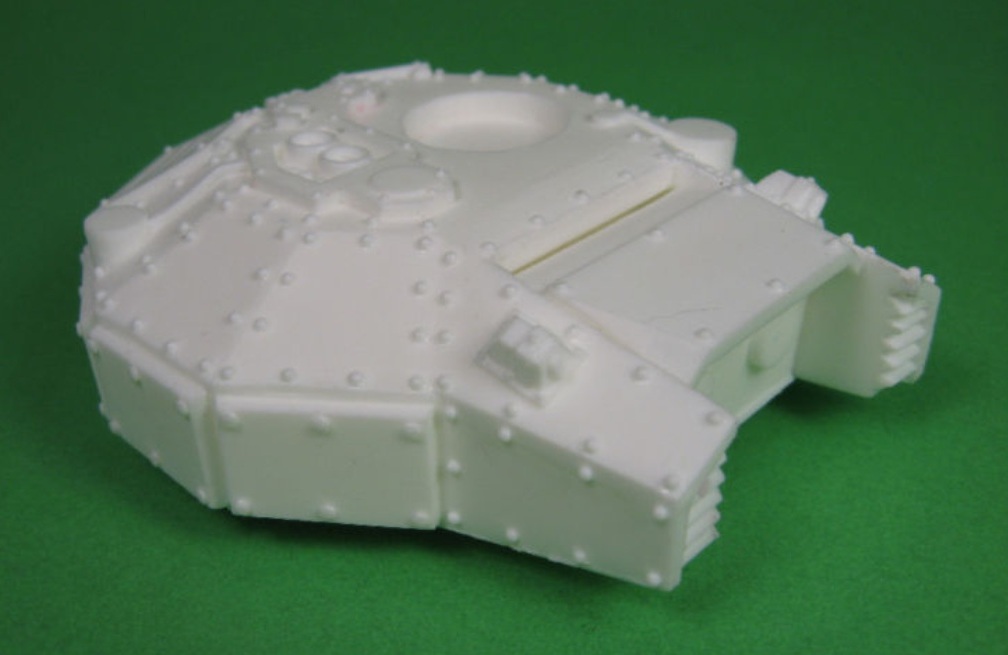
After working up the upper structure I started laying out the templates for the lower half of the vehicle and hit my first major snag - the plastic signage that I got wasn't large enough to accommodate the templates so that's on hold for the time being while I research other options. I did go ahead and cut out the first set of panels for the upper structure from plastic and did some test fitting, though:
.JPG)
.JPG)
It works! At the moment the panels are just held together with tape as a test fit. I'm still working out how I want to brace the internal structure to give it some rigidity without making it too heavy. I'm toying with the idea of gluing the bottom and sides together, but leave the top panels off and fill it with expanding foam then trim off the excess before securing the top plates. I have a feeling that may be more trouble than it's worth however, visions of unintentional mushrooming foam sculpture dance through my head...
For the treads and weapons I'm going to be ordering a number of items from perennial favorite Tom McBride, whose eBay store Blood and Skulls Industry has a vast number of excellent bits I'm intending on incorporating into the project, including some 2" wide treads that should be ideal, as well as some beautiful turrets for the top and side sponsons. Here's hoping I can do the rest of the build justice!


.JPG)


You are a mad man! I love it. Can't wait to see it coming together. Caution: Don't use the expanding foam without reinforcing the frame and leaving the foam an easy escape route. That crap is super strong and aggressive. You'll end up with a very tough but very warped command vehicle otherwise;)
ReplyDeleteDamned cool project!
ReplyDeleteI once had the idea of trying to make a Squat Land Train back in 2nd Ed. didn't go very well. :)
YES YES YES! I love these projects! Best of luck with it. I'd love to get around to making one at some stage too :)
ReplyDeleteAs Zab said use caution with the expanding foam, my experience is to leave it a long time because it just keeps expanding! But I'm sure you will be fine.
I'm excited because I know this project is going to be awesome - considering the things that you have made ion the past!
You sir, are utterly mad. Which makes me utterly mad, because I think this is amazing! Really looking forward to seeing this!
ReplyDeleteThanks folks! It's a bit of an ambitious project, and while I don't have nearly the plasticard skills that others have it's going to be fun even if it turns out as a comedy of errors. Heh.
ReplyDeleteSounds like the common wisdom is the expanding foam would be more trouble than it's worth, and I'll be better off doing internal buttressing with plastic. I'm going to take a whack at cutting a number of further "front and back" templates slightly smaller than normal (to account for the interior dimensions) and using them spaced out through the interior as a sort of "skeleton". Luckily nothing has been permanently glued together as yet, so I can try out several options.
I'll try and get some miniatures in frame as well for scale. While on paper 10"x14" doesn't sound like a lot, in person the initial mock up is quite large!
Totally Epic!
ReplyDelete