Tuesday, April 19, 2016
Heresy Era Thousand Sons - Batch Painting Breakdown, or, Lets Get Critical
This marks the penultimate post about the infantry, I believe! While batch painting mixed models like I have been doing recently means that I'm never quite painting the exact same miniature more than a couple times in a row before moving on to a different type, it also means that certain fine details start to get missed when they aren't common to the various types. Generally towards the end of the process I'll pull things back out into their constituent squads and take some pictures (generally not posted to the blog) which allows me to review the models in absurd scale (which naturally enhances every flaw) and take notes of what remains to be done before the sealant stage. So, these are those notes to which I will refer next painting session! Usually I'll just scribble these down on a legal pad and reference it and delete these interstitial pictures, but it's been fun documenting the whole absurd process...
Terminator Squad Ankhet - Highlight the eye lenses, and give the loincloth red a further highlight. Specular dots on the green gems.
Terminator Squad Phosis - Ditto.
Veteran Squad Khalmekt - Highlight eye lenses, metal on the helmet grills and hoses. Red stripe around the hem of the sergeant to match the terminators.
Tactical Squad Hesyre - Ditto.
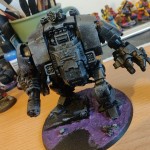
Centurion Delgatus and Librarian - Ugh. For pete's sake, I forgot to finish the librarian's face! Highlight the loincloth detail, script on the oaths of moment, white highlight on the horned skulls on the librarian. Eye lenses, helmet grill and hoses in metal, wash and highlight the wrist terminator medal and chain, wash and highlight chest skull and hoses, green gems on the helmet vanes.
So a fair bit of fiddly details to do yet, but for the most part it's going to just be a few subsets of batch painting as for the most part they're all getting the same sort of cleanup within each squad. Overall though, I'm fairly well pleased with how they're coming along!
Labels:
Conversion,
Horus Heresy,
Tactical Squad,
Terminators,
Thousand Sons,
Veterans
Subscribe to:
Post Comments (Atom)


.jpg)


.JPG)


At least they are in a suitable condition to put on the table and play with. Everything else is candy, those little details will really help things pop.
ReplyDeleteGreat work man. Hope you enjoy the event now :)
Looking good, in all fairness, I miss details all the time when painting one or two miniatures, it's par for the course I think.
ReplyDeleteYou are a machine! These models look amazing! It's great to get a look inside your head to see how you do it.
ReplyDeleteAwesome work! You are a master of utilizing color and contrast to give models lots of presence on the table!
ReplyDelete@Rory Priest: Thanks! Aye, after the test game with the Spireguard I just felt dirty (it was a filthy list), much rather bring my beloved Sons to the event!
ReplyDelete@Bronislav Czevak: Indeed! There's always something that gets missed in my work too - usually only noticed after I take them out to do the spray sealant. hah!
@Col. Hertford: Thanks very much, man! Doing these "every step of the process" posts has really helped me examine my own methods and hopefully be able to find one or two more things to tweak and fix for future projects.
@Greg Hess: I appreciate it, man!
Thanks for the kind words everyone!
I should probably try this method out. I like how it helps you keep track of where you're at.
ReplyDeleteVery nice work as usual :)
ReplyDelete@Dai: Cheers mate - it definitely forces me to think hard about the process!
ReplyDelete@Musings of a Smurf: Thanks very much!