
.JPG)
It's a big ol' brick of resin, and it balances precariously on the flight stand. I truly have a fear of it tipping over and mashing flat any miniatures it may fall upon! While it did take a fair bit of hot water bending to get the front assault booms straight and assembled, it was overall a snap to build. It really has a heavy, meanacing look to it - rather suitable for an assault craft!
.JPG)
.JPG)
.JPG)
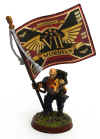
I used some Iron Hands brass etchings on the tops of the booms and on the sides, but otherwise went fairly minimalist with the paint scheme as befitting the Legion. I did manage to miss one of the aquilas (right on the freakin' middle of the cockpit) which was annoying - generally speaking during the heresy only the Custodes and the Emperor's Children bore the aquila. Ah well, just left it back to de-emphasize it. I do think that I need to add a little cogtooth pattern on it somewhere, perhaps on the wings?
.JPG)
To facilitate storage and transport, the wings are attached via a combination of magnets and pins - the magnets by themselves didn't prove strong enough, and the pins help hold everything straight and level.
With that, there's just one unit of Veterans left to be painted prior to the Heresy Event Weekend in mid-January! ...But there's likely a few more units to be added to the army once I get on the other side of that.
Hope you all have a great New Year, and we'll see you again in 2014!


.JPG)


My fav Space Marine flyer and you've made it look very nice sir.
ReplyDeleteAny chance you can widen the base to limit the chance of it tipping over? Would hate to read some horror story that both it and other precious models of this army were damaged otherwise.
Nicely done, my friend :-)
ReplyDelete@Dai: Thanks man! It's actually the forward/backward tip that I'm worried about - those assault booms to the front are surprisingly heavy. I'm thinking I'll cut an inch or so off the clear rod and bring the center of gravity down a touch.
ReplyDelete@Stephen: I appreciate it!
@Frothing Muppet: Cheers mate! I'm partial to the Storm Eagle's looks, but that kit was such a nightmare to assemble I figured I'd give this one a go instead. :)
Looks great dude! I love the etching work, really ties the model to the rest of your army. Very impressive model!
ReplyDeleteNice call on the iron flanks and top it would have looked too black otherwise. All the best in 2014!
ReplyDeleteGreat job on the flier! It has been great watching your army come together. Hopefully they serve you well in battle!
ReplyDeleteNice, I like the idea of having one but could not bring myself to pay for something that I'm sure I could scratchbuild relatively easily, the only real cost being time. It'd be lighter too.
ReplyDeleteWe'll see how I'm fixed later in the year.
Nice. From this angle, it looks grey and black... now where have I seen that great colour scheme before?? Ah... about time I made and painted mine that has been languishing in a box for over a year!
ReplyDelete@Jugger: Thanks! I've been digging the brass etch, acts as a great painting guide for later!
ReplyDelete@Zab: You too! Aye, I was worried about it just being a big black brick, it definitely needed some off-color panels.
@Adam Wier: Thanks mate! They'll definitely be getting a trial by fire in January!
@Dave Weston: It is pretty blocky, very doable in plasticard for sure!
@Siph_Horridus: I would love to see what you do with one!
Happy New Year, everyone!
My word, that is bloody lovely to say the least. Like Dai it's my favourite Marine flyer (the only one I like really) and you've done a belting job on it sir. Loving these Iron Hands
ReplyDeleteI think if I wanted to incorporate cogs I'd use the ones modelled into the caestus already around the two transport pylons. They're only on the top but you could easily extend that around the tips with freehand.
ReplyDelete@Kieran: Thanks very much!
ReplyDelete@TheAmbit: Good call! It definitely needs a little something extra, and I totally agree with your idea. Cheers!
It's a great model but I find you have to be creative to add colour/flare to it (at least without making an eyesore). I've been back and forth debating adding more colour to mine as well.
ReplyDelete